• Skip to primary navigation
  • Skip to main content
  • Skip to primary sidebar
  • Home
  • FAQS
  • Privacy Policy

Rants From My Crazy Kitchen logo

  • About
  • Recipe Index
  • Contact Me/Work With Me!
menu icon
go to homepage
search icon
Homepage link
  • Home
  • FAQS
  • Privacy Policy
  • Follow Me!

    • Facebook
    • Pinterest
    • Twitter
  • ×
    Home » Recipes

    Recipes

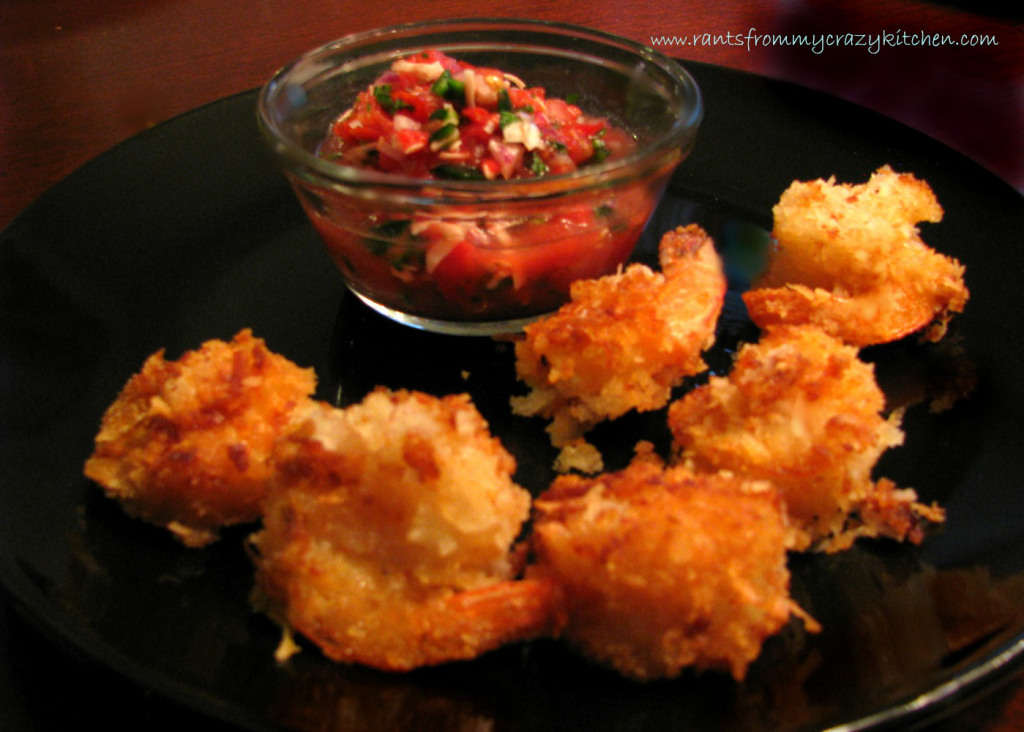
    Coconut Shrimp with Tomato Coconut Salsa

    September 20, 2013

    CIC_header

    I almost backed out of this month's crazy ingredient challenge, Coconut and Tomato. I never liked coconut, something about the texture more than the taste. Then I remembered that I had coconut shrimp once and I liked it. I guess once the coconut is fried it no longer has that texture I don't like 🙂

    Having decided I was going to make coconut shrimp, I then put it off for a few weeks until the week of my sister's birthday. She was coming over at dinner time on her birthday, so I gave her a few choices of what we could have, and she chose the coconut shrimp.

    I was aiming for a sweet and spicy taste in both the shrimp and the salsa, but ended up with sweet and crunchy coconut shrimp that we all loved, and I delicious salsa with just a hint of sweetness. If you would like it more spicy, just leave some more seeds from the poblano peppers in the salsa, and add more red pepper to the flour mixture below.

    coconutshrimp


    Check out what everyone else made for this challenge immediately following my recipe!

    Print Recipe
    3 from 1 vote

    Coconut Shrimp with Tomato Coconut Salsa

    Crispy coconut shrimp with a fabulous coconut salsa dipping sauce
    Prep Time50 minutes mins
    Cook Time10 minutes mins
    Total Time1 hour hr
    Course: Entree or Appetizer
    Servings: 4
    Calories: 978kcal
    Author: Bernadette

    Ingredients

    • For the Tomato Coconut Salsa:
    • 2 cups diced fresh tomatoes seeded (4-6 tomatoes)
    • ⅓ cup poblano peppers diced fine (seeded, or leave a few seeds if you would like it spicy!)
    • ¼ cup finely chopped purple onion
    • ¼ cup flaked sweetened coconut
    • 1 ½ tablespoons chopped cilantro
    • salt and pepper to taste
    • a few drops each lemon and lime juice
    • For the Coconut Shrimp:
    • 2 pounds raw shrimp , peeled, deveined, and butterflied
    • 1 ½ cups sweetened flaked coconut
    • 1 ½ cups plain panko breadcrumbs
    • 1 cup flour
    • ½ teaspoon red pepper
    • ½ teaspoon garlic powder
    • ½ teaspoon onion powder
    • 1 15 ounce can coconut milk
    • salt and pepper
    • vegetable or canola oil for frying

    Instructions

    • For the salsa: In a large bowl, combine chopped tomatoes, peppers, onions. Stir in the flaked sweetened coconut, chopped cilantro, salt, pepper, lemon, and lime juice and mix well. Cover and refrigerate for a least an hour.
    • For the shrimp: Peel, de-vein, and butterfly the shrimp, if necessary ( or just save your sanity and get it from your grocery store/seafood market/ place where they sell the yummy sea animals already done!).
    • In a small bowl combine the flour with the red pepper, garlic powder, onion powder, salt and pepper.
    • In another small bowl mix the coconut milk with salt and pepper.
    • In a food processor pulse the flaked sweetened coconut just until the sugar is broken up and the coconut is in short strips ( this helps the coconut stick to the shrimp). Mix the coconut with the panko breadcrumbs in another bowl. Depending on the size of your bowl, you might have to mix half at a time.
    • Working one shrimp at a time dredge the shrimp in the flour, shake off excess, then dip in the coconut milk ( let the excess drip off), then into the breadcrumb/coconut mixture. Lightly press the mixture into the shrimp to ensure it sticks, then place on a cookie sheet or large plate.
    • When all of the shrimp are coated, place them in the refrigerator for about 10 minutes.
    • Heat about an inch of oil in a large frying pan. Working in batches, fry the shrimp for 2 minutes, then carefully turn and fry for 2 minutes more. Drain and place in a warm (250 degree) oven to keep warm while the rest are cooking.
    • Serve immediately with the tomato coconut salsa on the side.

    Notes

    Coconut Shrimp recipe HIGHLY adapted from Food Network Neely's Jumbo Coconut Shrimp

    Nutrition

    Calories: 978kcal | Carbohydrates: 69g | Protein: 57g | Fat: 62g | Saturated Fat: 35g | Cholesterol: 571mg | Sodium: 2055mg | Potassium: 889mg | Fiber: 9g | Sugar: 21g | Vitamin A: 685IU | Vitamin C: 33.4mg | Calcium: 404mg | Iron: 10mg


    If you are a food blogger and would like to take part in the Crazy Ingredient Challenge, click the button below for details!

    HunngryLittleGirl

    Bacon Egg and Cheese Corn Muffins

    September 13, 2013

    A few weeks ago I made my 4 year old daughter cupcakes one night. The next day she wanted them for breakfast and my husband and I  told her "No cupcakes for breakfast" but then we both started thinking about breakfast muffins, and eventually I thought of corn muffins filled with scrambled eggs, bacon, and cheese. Not mixed in the batter but topped with some of the eggs cooked right in the muffins to hold everything together. It took me a few weeks until I was able to make them, and boy am I glad I did! They are delicious, would be great for a brunch or holiday breakfast, and can be made the night before and reheated in the microwave.

    Bacon Egg and Cheese Corn Muffins

    Bacon Egg and Cheese Corn Muffins

    Quaker Yellow Corn Meal ingredients

    ½ lb bacon, cooked well enough to crumble but NOT well done

    9 eggs, scrambled but still a little runny

    ¾-1 cup shredded mild cheddar cheese

    Preheat oven to 400 degrees F. Prepare ingredients for corn muffins according to Quaker yellow corn meal directions. Grease a 12 cup muffin tin well with butter, including around the rims.

    Pour prepared muffin mix equally into greased tins and bake for seven minutes. Meanwhile, cook the bacon, drain, and set aside until cook enough to crumble.  Scramble the eggs until cooked but still a little soft (lightly done).

    Remove partially baked muffins from the oven, and using a teaspoon spoon out a hole in the middle of each muffin, about an inch down. The muffins will be unbaked in the middle, you can spread the uncooked muffin mix around the outside of each muffin, or discard the excess.

    Spoon a little of the scrambled eggs into the middle of each muffin hole ( does that sound bad, or is it just me? ;))   then top with crumbled bacon and shredded cheddar cheese. Return to the oven for another 5-7 minutes, or until the muffins are cooked through and the cheese is melted. Serve warm with a glass of tomato juice ( you need to get those veggies in, right? Ok, I just happen to like tomato juice!)

    Variations:

    Add ⅛ of a teaspoon of black pepper or a few dashes of hot sauce to the muffin mix.

    Add sautéed chopped vegetables (peppers, tomatoes, onions...) to the scrambled eggs.

    Mix a little salsa with the scrambled eggs and top with Mexican cheese.

    This recipe is feature on Foodie Friends Friday Cheese Party.

    Clam Fritters

    September 12, 2013

    Clam Fritters Recipe

    I made these clam fritters a while back, and they were great, but I just got busy and forgot to share the recipe for them. I would suggest making them smaller than I did, since clam fritters are usually an appetizer. I ended up making almost a whole meal out of just three of these! Of course, you could keep them as big and make a vegetable on the side for a whole meal. I used chopped clams instead of minced because I like the bigger clams, just like in my New England Clam Chowder, but you can use minced if you prefer.

    Clam Fritters Recipe

    I hope you love these clam fritters as much as I did!

    Print Recipe
    3.45 from 9 votes

    Clam Fritters

    Prep Time5 minutes mins
    Cook Time10 minutes mins
    Total Time15 minutes mins
    Course: Appetizer
    Servings: 4
    Calories: 305kcal
    Author: Bernadette

    Ingredients

    • 2 6.5 ounce cans chopped clams
    • 1 ⅓ cups all-purpose flour
    • 2 teaspoons baking powder
    • 1 teaspoon Old Bay Seasoning
    • ¼ teaspoon cayenne pepper
    • 1 ½ tablespoons chopped chives
    • salt and pepper to taste
    • 3 tablespoons clam juice
    • 1 tablespoon lemon juice
    • 2 eggs beaten
    • 2 tablespoons milk
    • Oil for frying

    Instructions

    • In a large mixing bowl combine flour, baking powder, Old Bay Seasoning, cayenne pepper, and salt and pepper. In a separate medium-sized bowl combine clams, clam juice, lemon juice, eggs, chopped chives, and milk. Pour the combined liquid ingredients into the dry ingredients, and mix well.
    • In a large frying pan, heat 2 inches of oil until hot, then, working in batches, drop mixture by spoonfuls ( use less, if you want them bite-size). Fry until golden brown, turning once. Drain and keep warm in a 250*F oven while the remainder are frying.

    Nutrition

    Calories: 305kcal | Carbohydrates: 35g | Protein: 8g | Fat: 22g | Saturated Fat: 2g | Cholesterol: 85mg | Sodium: 131mg | Potassium: 296mg | Fiber: 1g | Sugar: 1g | Vitamin A: 275IU | Vitamin C: 2.6mg | Calcium: 122mg | Iron: 2.8mg


    Raw Delicious Healthy and Fudgy Brownies

    September 4, 2013

    Summer's all but over 🙁 Today's guest post is the last of my summer guest posters, wow that went fast! I hope you enjoyed all the different recipes that were shared, so many different things 🙂 Last, but definitely not least, I leave you with April from My Real Food Family.

    Thanks to My Crazy Kitchen for allowing me to guest post today! Just a little about me:

    12394_10201085191835783_1610395954_n

    Hi! My name is April Mims from My Real Food Family. I live in Texas (where it's about a billion degrees right now) with my husband, 2 daughters (1 is away at college), 2 cats, and 1 dog. As a busy mom and distance runner with very minimal cooking skills (and by minimal I mean none) and extremely limited time, I often turned to convenience foods that were so unhealthy for us and loaded with artificial ingredients. Just read the ingredient list on some foods - I couldn't even pronounce many of them! So I began the quest to switch my family over to all real foods. Once we started, it wasn't as bad as we thought. Actually, it was quite good! After a while I actually started craving vegetables and healthy foods! Who knew vegetables could be this good and just as easy to cook?!? So now between work, life, and marathon training, I experiment with healthy food recipes and blog about them. You might even be surprised at the healthy foods that you can sneak in without anyone knowing that it's healthy! This is definitely one of those recipes that you would never know that was healthy!

    Check out my blog, Facebook, and Pinterest for all of my easy real food recipes and some fitness motivation!

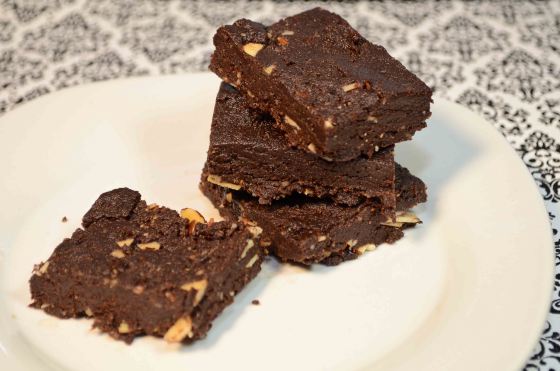
    One of the hard things about starting to clean up my diet was giving up sweets. True, certain desserts can be cleaned up so they are healthier but most of the time it's just not the same. I finally found a healthy dessert that is even better than the original. Yes, I said it, these brownies are better than traditional brownies. They taste just as good (or better) as other brownies but only have 3 ingredients and require no baking (considering it's been 100 plus degrees here for weeks, turning the oven on to 350 degrees held absolutely no appeal to me). No bake brownies, you say? How is that possible? Well, they don't have eggs or oil or anything that requires any baking. That means that you can down to the real business of eating them and not having to wait for them to cool! Because dates are naturally so sweet, you don't need to add any refined sugar. These brownies really are a guilt-free dessert! And because they don't have any flour or eggs, they are perfect for our gluten-free and vegan friends!

    DSC_9185-2

    Raw Delicious Healthy and Fudgy Brownies

    (makes about 16 brownies, depending on what size pan you use and what size brownie you consider a serving :))

    Ingredients:

    2 cups of walnuts

    24 medjool dates, halved with pits removed

    1 cup unsweetened cocoa powder

    ¼ cup sliced almonds (optional - I added since we like nuts in our brownies)

    Directions:

    Add walnuts to food processor and chop until powder-like. Add in cocoa powder and combine. Add dates to food processor and combine thoroughly. I only add 2-3 dates at a time to not overwork my Ninja. If you want to add almonds, do it now and mix slightly. Scoop mixture into a parchment paper lined pan and press down. Refrigerate for about 20 minutes to allow to harden some. Cut and enjoy!


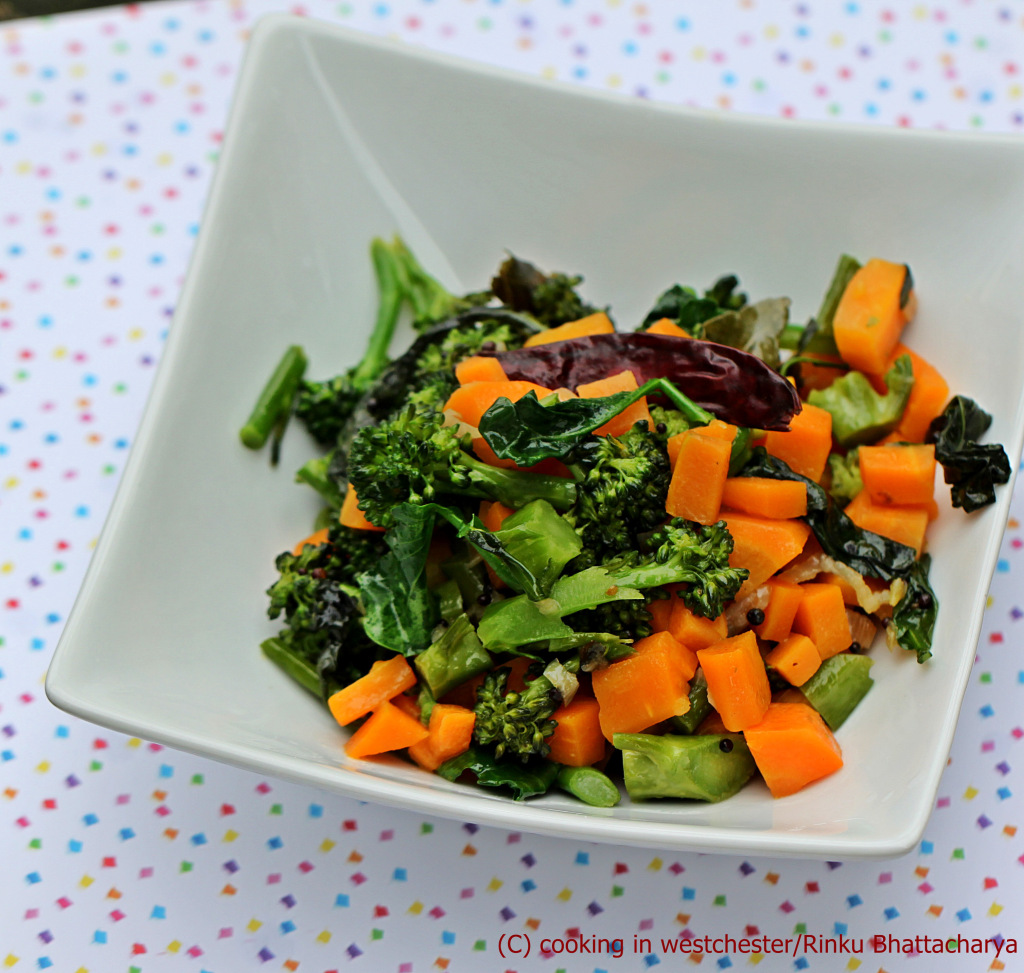
    Carrots and Broccoli with Toasted Mustard Seeds and Curry Leaves- Guest Post from Cooking in Westchester

    September 2, 2013

    With summer coming to an end, things have been even more hectic than usual! Although summer is my favorite time of year, the good news is I should be getting back to more regular posting soon.  Today I have a guest post from Cooking in Westchester, here with a great side dish!

    I am happy that this year, we have done a good job of merging our flavors and spices into the children’s meals, making a lot of them all purpose family meals. This becomes especially important during the early weeks of the back to school routine, which often take a little time to sink into.

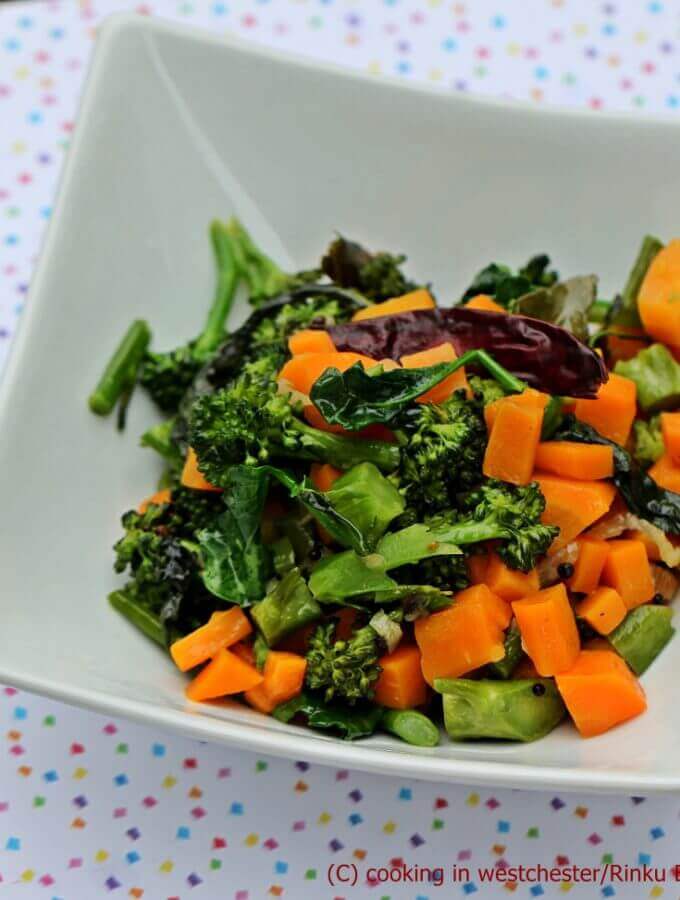
    It is always lovely to have fresh vegetables around, it allows for quick and spontaneous creativity. This broccoli and carrot stir fry is a new-comer in the kitchen, redolent with garlic and toasted mustard seeds and some curry leaves. I was actually thrilled to have my daughter comment on how much she liked the smell of curry leaves when they were cooking.

    With flavors, the kids are also a tag team, with older one leading the charge. This works both ways, the good news is that when she approves of something the younger one is usually happy to jump on the bandwagon. The reverse is not always true. Well, today curry leaves however passed the muster and this bright and nutritious dish has been inducted into the, “household staples” hall of fame.

    Here is the recipe, which I finished off with a nice touch of red pepper flakes and a good squirt of lime juice for us grown-ups.

    Stir Fry

    Carrots and Broccoli with Toasted Mustard Seeds and Curry Leaves

    Prep Time: 15 minutes

    Cook Time: 20 minutes

    Serves 4

    Ingredients

    6 medium sized carrots (about ¾ pound)

    ½ pound of broccoli florets (you can use the tender leaves, too, if you are using garden fresh broccoli)

    3 tablespoons oil (preferably olive oil)

    1 teaspoon black mustard seeds

    2 teaspoon freshly grated ginger

    3 pods minced garlic

    10 curry leaves

    Salt to taste

    1 teaspoon freshly ground coriander

    1 teaspoon red pepper flakes

    Lime or lemon juice

    Method of Preparation

    1. Peel the carrots and cut into a dice.
    2. Chop the broccoli into small pieces.
    3. Heat the oil on medium heat for about 1 minute and add in the mustard seeds and wait until they crackle.
    4. Add in the ginger and garlic and gently stir until very aromatic.
    5. Add in the curry leaves and add in the carrots and stir well.
    6. Stir in the salt and cover and cook on low for 3 to 4 minutes.
    7. Mix in the broccoli florets and the leaves (if using) and stir in the coriander powder.
    8. Cook for another 5 minutes, until the vegetables are tender crisp.
    9. Stir in the red pepper flakes and squeeze in the lime juice and serve.


    Philly Cheese Steak Stuffed Bell Peppers

    August 21, 2013

    Philly Cheese Steak Stuffed Bell Peppers Recipe
    Today's guest post comes from my friend Sara from My Imperfect Kitchen. If you've been following along, you might remember her name. A few months ago I made her Bacon Wrapped Jalapeno Poppers, and they were amazing! I imagine these stuffed bell peppers are going to be just as amazing! And now Sara:
    Sara, from the food blog, My Imperfect Kitchen
    Hello Crazy Kitchen Readers!  I'm Sara, the voice and home chef behind My Imperfect Kitchen. (http://www.myimperfectkitchen.com)  We all know life isn't perfect, but I believe it should always be delicious! I have so much fun learning new things about the food world and sharing cooking classes and food events.  To say that food is a passion of mine is a total understatement.  Recently I signed up for my first 5K and I'm doing a Couch to 5K training program.
    Eating healthy has to be a way of life. It's not a diet. It's not a destination. It's a journey. Along this journey of finding healthier ways of eating our favorite foods, we stumbled across an idea for Philly cheese steak stuffed bell peppers.
    stuffedpeppers1
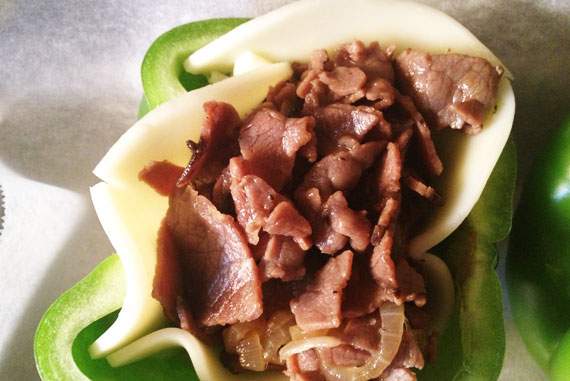
    Instead of bread, use your favorite cheese steak fillings and bake them inside a bell pepper! Split the pepper in half, straight through the stem. Clean out the ribs and the seeds, then line each pepper half with a slice of Provolone Cheese. Set aside while you cook the filling.
    stuffedpeppers
    Saute sliced onions with butter and olive oil over medium heat until they are golden brown and nicely caramelized. My family is not a big fan of mushrooms, so I didn't include any in this recipe. If you are a fan though, you will want to add them. I love the additional flavor they bring to the peppers. (I am a lone mushroom lover in a house of fungus haters. You should feel sorry for me.) Toss in a few cloves of minced garlic and continue to cook another minute or two.
    Once the onions (and mushrooms) are caramelized, add thin strips of sliced roast beef and sauté until everything is heated through.
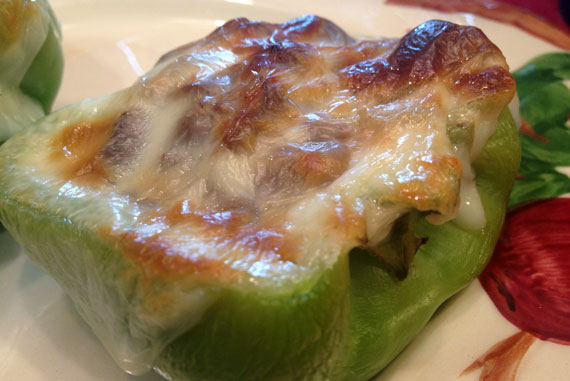
    Fill each pepper half with the meat mixture until nearly overflowing. Cover everything with another slice of provolone cheese. Bake these stuffed bell peppers until the cheese on top is a nice golden brown.
    I let mine go about 30 seconds too long, but they were still delicious!
    stuffedpeppers4
    At only 6 carbs per serving, you can't go wrong with this healthy alternative to the traditional Philly Cheesesteak Sandwich. The caramelized onions and garlic make the meat so flavorful, you won't even miss the bread. I promise!

    Philly Cheese Steak Stuffed Bell Peppers

     
    Print Recipe
    No ratings yet

    Philly Cheese Steak Stuffed Bell Peppers

    All of the taste of a classic Philly Cheese Steak Sandwich, stuffed into a sweet bell pepper.
    Prep Time10 minutes mins
    Cook Time45 minutes mins
    Total Time55 minutes mins
    Course: Main
    Servings: 4
    Calories: 416kcal
    Author: Bernadette

    Ingredients

    • 8 oz. Thinly Sliced Roast Beef
    • 8 Slices Provolone Cheese
    • 2 Large Green Bell Peppers
    • 1 Medium Sweet Onion
    • 2 Tbs. Butter
    • 2 Tbs. Olive Oil
    • 1 Tsp. Garlic minced
    • Salt and Pepper – to taste

    Instructions

    • Preheat oven to 400 degrees
    • Slice peppers in half lengthwise, remove ribs and seeds.
    • Thinly slice onion. Saute over medium heat with butter, olive oil, minced garlic and a little salt and pepper. Saute until onions are caramelized, about 20 minutes.
    • Slice roast beef into thin strips and add to the onion/mushroom mixture. Allow to cook 5-10 minutes.
    • Line the inside of each pepper with a slice of provolone cheese.
    • Fill each pepper with meat mixture until nearly overflowing.
    • Top each pepper with another slice of provolone cheese.
    • Bake for 15-20 minutes until the cheese on top is golden brown.
    • Serve and Enjoy!!

    Nutrition

    Calories: 416kcal | Carbohydrates: 10g | Protein: 27g | Fat: 29g | Saturated Fat: 14g | Cholesterol: 86mg | Sodium: 1402mg | Potassium: 438mg | Fiber: 1g | Sugar: 5g | Vitamin A: 890IU | Vitamin C: 77.7mg | Calcium: 605mg | Iron: 1.9mg
    Happy and Healthy Eating, friends!
    Still hungry?  Follow my adventures:
    On my blog: www.myimperfectkitchen.com
    On Facebook: www.facebook.com/MyImperfectKitchen
    On Twitter and Instagram: @MyImpKitch
    At Pinterest: www.pinterest.com/MyImpKitchen

    Avocado Caramel Chocolate Mousse

    August 20, 2013

    CIC_header

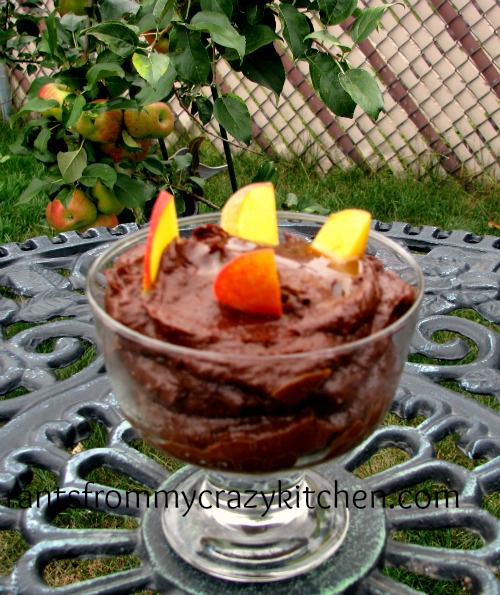
    Yes, you read that title right, avocado and caramel mixed with cocoa powder to create a delicious mousse that no one could resist! Avocado and caramel are the ingredients in this month's Crazy Ingredient Challenge hosted by Hungry Little Girl. I happen to LOVE avocado, but I never made anything like a dessert with it before. I thought about making a cheesecake, but I wanted something completely different. Oh, yeah, I never made a mousse before last night ( Sunday) either 🙂 This isn't a light, airy mousse, it's much denser, and very rich tasting, so it would be perfect for a special occasion.

    EdAvoCarmChocMousee


    Print Recipe
    No ratings yet

    Avocado Caramel Chocolate Mousse

    Chocolate and avocado combine to make a fabulous, thick mousse!
    Prep Time15 minutes mins
    Total Time15 minutes mins
    Course: Dessert
    Cuisine: American
    Servings: 5
    Calories: 314kcal
    Author: Bernadette

    Ingredients

    • 3 ripe avocados
    • ¼ cup sugar
    • ⅔ cup unsweetened cocoa powder
    • ½ cup caramel syrup plus a little extra to drizzle on top
    • sliced fruit of your choice: strawberries, blueberries, peaches, etc

    Instructions

    • Using a sharp knife, slice the avocados and remove the pits. Coarsely chop, if desired.
    • Put into a food processor and add the sugar, cocoa powder, and caramel syrup. Process for a few minutes, then turn off the food processor, scrap down the sides of the bowl with a spoon, and chop up the avocados a bit with the spoon if necessary. Continue to process for a few more minutes, stopping every two minutes or so to scrape the sides of the bowl. Process until the mixture is perfectly smooth, then transfer into dessert bowls.
    • Mixture will thicken with refrigeration. Top with sliced fruit if desired and drizzle with a little caramel syrup before serving.

    Notes

    Nutritional information does not include fruit topping.  

    Nutrition

    Calories: 314kcal | Carbohydrates: 41g | Protein: 5g | Fat: 19g | Saturated Fat: 3g | Sodium: 89mg | Potassium: 778mg | Fiber: 12g | Sugar: 10g | Vitamin A: 195IU | Vitamin C: 12mg | Calcium: 41mg | Iron: 2.3mg


    If you would like to join in the fun, please click on the button Crazy Ingredient Challenge on the left side of this blog, and be sure to check out all of the recipes that were shared this month by clicking here.

    Bring your favorite chocolate dessert to Roxana’s home baking #chocolateparty and win amazing prizes from , ,and

    Pilau - Guest Post From Foodie in the desert

    August 14, 2013

    Today's recipe comes all the way from Kenya, and my lovely friend Wangeci from Foodie in the desert. You can also find her on Facebook.  I hope you enjoy this recipe as much as I do!  Please welcome Wangeci:


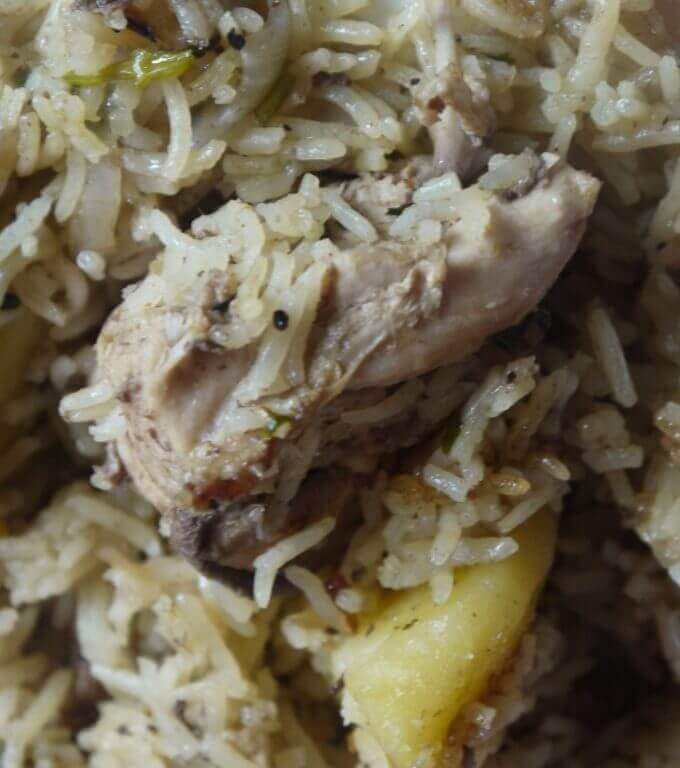
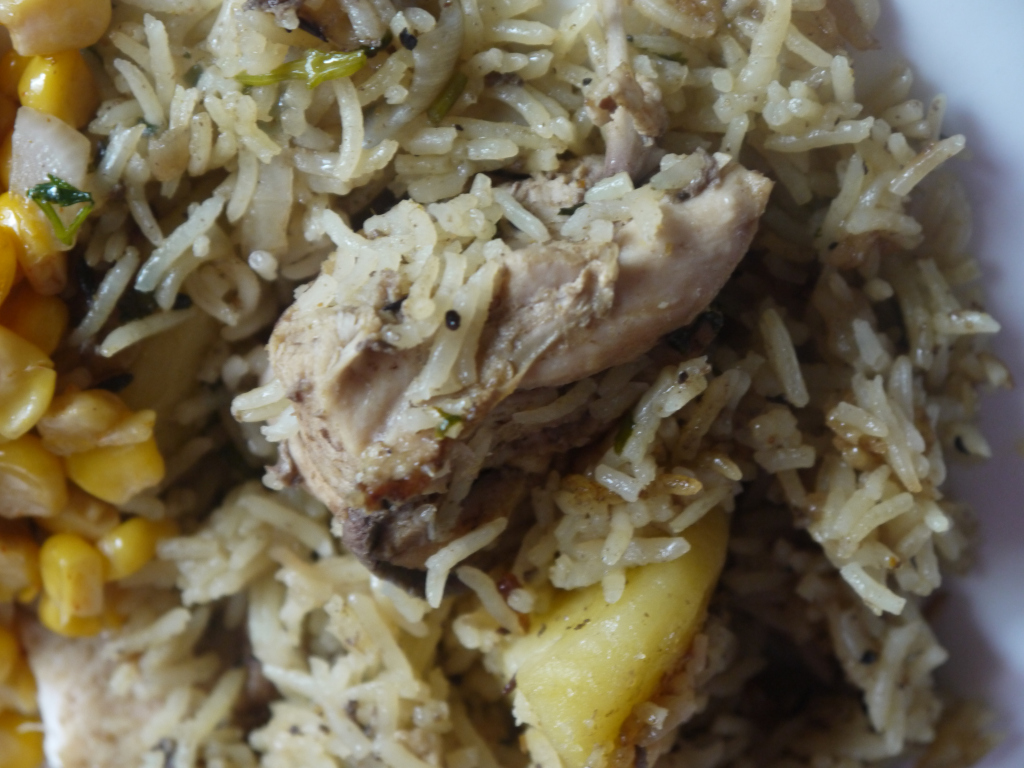
    Pilau is a typical Kenyan dish that you will not miss in any Kenyan gathering or celebration. It is one of the dishes that the people on the Kenyan coast adapted from the traders who traveled there in the 1700 for trade in spices. So in as much as the dish is Kenyan it is actually a dish that came from the coastal tribes of the country. You should make a point to visit the Kenyan Coast the white sandy beaches and the blue water are such a breath of fresh air and for the foodies the array of spices available for sale and also the food is just out of this world. I hope this dish will bring a piece of the Kenyan coast into your homes. HAPPY COOKING!!

    P1080409

    Serves 4-6

    Ingredients

    • 1 chicken cut up into pieces
    • 1 teaspoon ginger
    • 1 tablespoon garlic
    • 1 teaspoon salt
    • 1 teaspoon black pepper powder
    • 500 grams of rice
    • 3 onions, chopped
    • 3 potatoes, peeled and cut into 4 pieces each
    • ½ teaspoon turmeric powder
    • ½ teaspoon cumin/coriander powder
    • ½ teaspoon freshly ground roasted cumin powder
    • 3 tablespoon butter
    • 5 tablespoon oil
    • 1 tablespoon garlic paste (extra)
    • a bunch of dhania (coriander), chopped

    Spices

    • 1 level tablespoon whole cumin
    • ½ teaspoon whole pepper
    • 2 sticks cinnamon
    • 2 cloves
    • 2 cardamom

    METHOD

      1. Soak the rice in 4 cups of water for at least 30 minutes
      2. Put the chicken with 1 tablespoon of garlic,1 teaspoon ginger, black pepper and salt. Add the water. Simmer on low heat for 15 minutes ONLY. The chicken will cook later
      3. Put a big pot on heat. Once it is hot add the oil and butter. Once butter is melted add the spices in the spices column. Stir and once they begin to splutter add onions and cook till they are translucent then add in the potatoes, turmeric and cumin/coriander powder. Stir and fry for a few minutes then add in the remaining garlic and the chopped coriander.
      4. Add in the boiled chicken stir well then add the stock ( the ratio of stock:rice is 1.25:1, 1 and ¼ cups of stock for every cup of rice) and some salt. Let it simmer then taste for salt. It should be “too” salty for your liking so that it’s just right when the rice is cooked.
      5. Drain rice and add to the pot, stir well then sprinkle with some coriander on top. Let it cook for about 2-3 minutes then reduce the heat to medium and cover with a lid. Once the water has reduced reduce the heat to very low. Let this cook for about ten minutes then switch off the heat.
      6. Fluff rice with a fork and leave the lid on for about 3 minutes.

    HAPPY EATING!!

    Miso Soup

    August 12, 2013

    I have this thing with scallions (green onions). I almost always forget to buy them when I need them. If for some reason I do remember them, well, then they go bad before I get to use them!

    The last time I had some scallions in the fridge, my husband suggested I use them, saying " Why don't you chop up those scallions and make them into a soup with like some soy sauce and chicken broth?" Um, yeah.

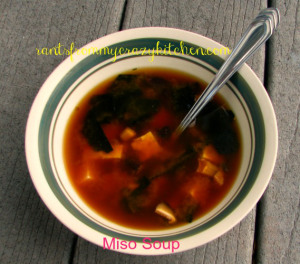
    I just happened to have all of the ingredients for miso soup on hand, so I made it at home for the first time ever! The soup in the picture below is from the second time I made it, and guess what? I forgot the scallions at the store.....

    Miso Soup 

    1  48 ounce carton chicken broth

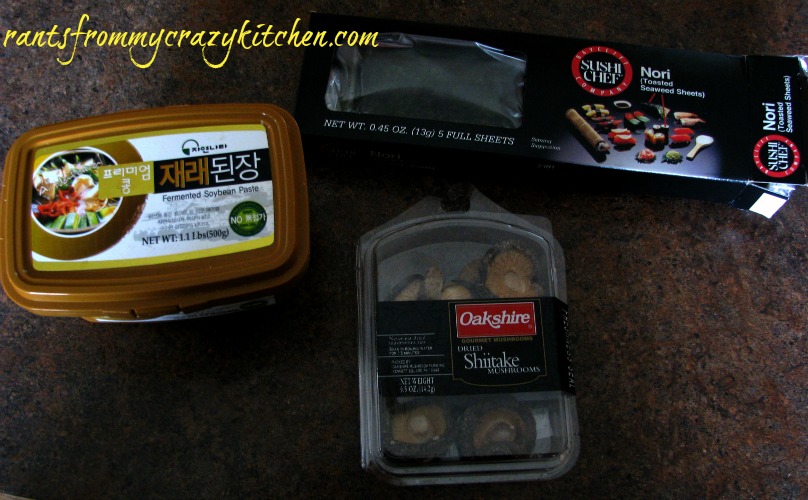
    ½ ounce dried shitake mushrooms

    1 cup cubed firm organic tofu (optional)

    3 scallions, sliced thin - green and white parts (optional)

    2 sheets dried Nori, cut into thin strips (found in the Asian foods section of the supermarket)

    3 tablespoons miso paste

    misosoupingred

    Directions:

    Bring the chicken broth to a boil in a large pot. Add the shitake mushrooms and reduce heat to a low boil. Boil the mushrooms in the broth for 15 minutes, then remove the mushrooms to a cutting board. When cool enough to handle, chop fine. Return the chopped mushrooms to the pot with the chicken broth, stir in the miso paste, then add the tofu, scallions, and nori. Bring to a simmer, heat through, and serve immediately.

    misosoup

    Lemon Meringue Thumbprints - Guest Post from Delish in a Dish

    August 6, 2013

    Today's guest, Sarah from Delish in a Dish, and I have something in common. We both love lemon meringue pie! Being limited on time, with a four year old and summer activities, means that I just wouldn't have time to make one right now. Well, Sarah has solved that problem with these cookies! I can't wait to try them, and I hope you enjoy them as much as I do. If you like them as much as I do and would like to see more please visit her blog Delish in a Dish. You can also find her on Facebook at https://www.facebook.com/DelishInADish or on Pinterest at http://pinterest.com/delishinadish/. 

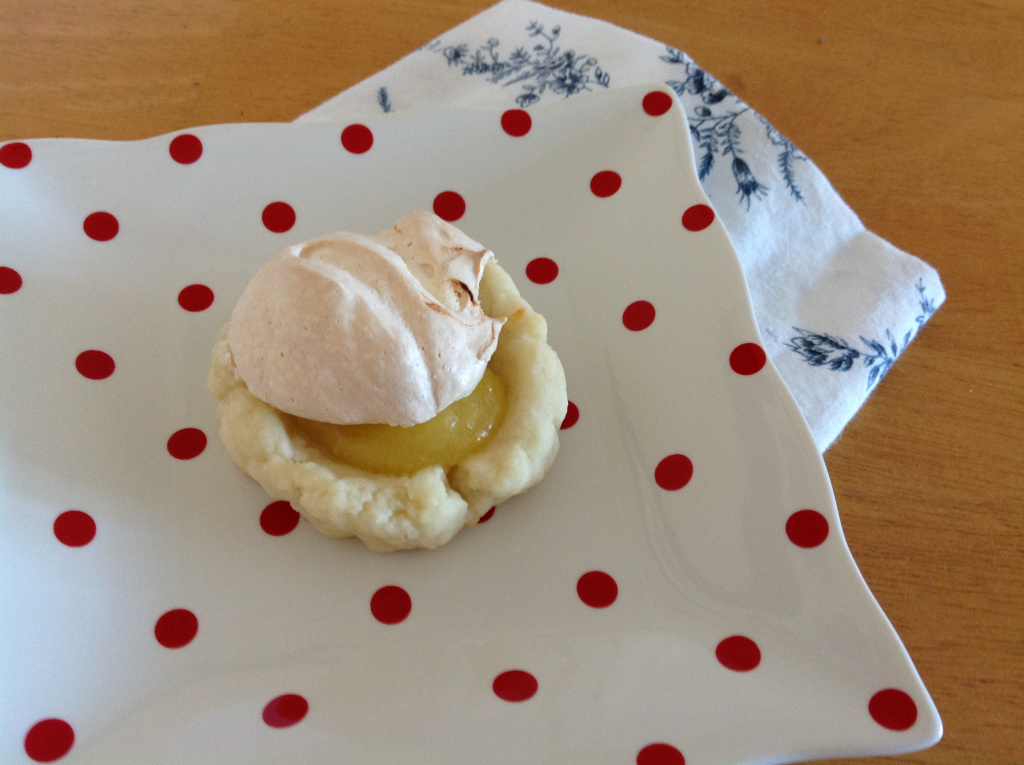
    Lemon Meringue Thumbprints from Delish in a Dish
    I love lemons. They're tart, bright, and zesty enough to use in a huge number of different recipes from appetizers to dinners to desserts. But there's definitely one lemon recipe that stands out from all the rest to me, a lemon meringue pie.
    The only problem with lemon meringue pies is that they take a while to make and bake, so they feel like special occasion food. So I decided the world needed something less special occasion and more everyday special. That's how I came up with Lemon Meringue Thumbprints.
    I kept everything I liked about a lemon meringue pie - the lemon curd, the meringue, and a delicious crust. And I took out all the aspects I didn't like - the steps for baking, and the feeling of needing to present the creation before enjoying a slice. I came up with flaky shortbread cookies topped with a lemon curd and meringue that I could bake in just one step.
    And the best part? If I want a taste of a cookie before dinner, I just rearrange the cookies on my serving dish and no one can tell the difference!
    lemonmerigunethumbprints
    Lemon Meringue Thumbprints - makes 12 - 15
    Shortbread ingredients
    1 ½ cups flour
    ¼ cup icing sugar
    ½ cups softened butter
    ½ teaspoon salt
    2 teaspoons milk
    Lemon curd and meringue ingredients
    2 large eggs, separated
    ¾ cup sugar, divided
    ½ teaspoon vinegar
    1 teaspoon corn starch
    ¼ cup lemon juice
    1 tablespoon lemon zest
    2 tablespoons butter
    1. Preheat oven to 350 degrees.
    2. Make your lemon curd and allow egg white to come to room temperature, or use about a cup of purchased lemon curd. Combine egg yolks with ¼ cup sugar in a small saucepan. Add lemon juice and zest and stir to combine. Place the saucepan on medium heat and stir until the mixture thickens slightly and will coat the back of a spoon, about 7 minutes. Stir butter into the curd and let cool in the fridge.
    3. Make your shortbread cookie. Combine flour, sugar, salt, and butter in a medium bowl. Pour a few drops of milk into the mixture if the dough is too dry. Set aside.
    4. Make your meringue. Beat egg whites in a clean, dry bowl until they form soft peaks, about 5 minutes. Add remaining ½ cup sugar and beat to form stiff glossy peaks, about another 5 minutes. Add corn starch and vinegar and stir to combine. Set aside.
    5. Take balls of the dough and press your thumb into each one to for deep wells. Form walls on each side of the cookies to prevent the lemon curd from pouring out while the cookies bake. Fill the holes with lemon curd and dollop a scoop of the meringue on top of each as well. Place cookies on a cookie sheet.
    6. Bake for about 10-15 minutes or until the bottoms of the cookies and the meringue brown. Let the cookies cool and enjoy!
    • « Go to Previous Page
    • Page 1
    • Interim pages omitted …
    • Page 36
    • Page 37
    • Page 38
    • Page 39
    • Page 40
    • Interim pages omitted …
    • Page 44
    • Go to Next Page »

    Secondary Sidebar

    Archives

    Browse by category

    • Appetizers (38)
    • Beef (24)
    • Breads (4)
    • Breakfast/Brunch (29)
    • Broths/Stocks (1)
    • Candy (1)
    • Casseroles (5)
    • Cauliflower (3)
    • Cheese (14)
    • Chicken (49)
    • Chocolate (13)
    • Christmas (14)
    • Cocktails/Beverages (7)
    • Cookies (7)
    • Crock Pot (8)
    • Cupcakes (2)
    • Desserts (41)
    • Dinner (20)
    • Dips (11)
    • Fruit (4)
    • Grilled (7)
    • Ham (6)
    • Healthy Recipes (3)
    • Instant Pot/Pressure Cooker (2)
    • Main Courses/Entrées (79)
    • Meats (8)
    • Pasta (29)
    • Pickles (1)
    • Pizza (8)
    • PKU Friendly (5)
    • Pork (13)
    • Potatoes (11)
    • Salads (14)
    • Sandwiches (4)
    • Sauces (11)
    • Savory Pies (3)
    • Seafood/Shellfish (38)
    • Side Dishes (19)
    • Slow Cooker (12)
    • Smoothies (1)
    • Snacks (1)
    • Soups/Stews (43)
    • Thanksgiving (8)
    • Tomatoes (4)
    • Turkey (11)
    • Vegan (10)
    • Vegetables (21)

    Footer

    ↑ back to top

    • ABOUT
    • RECIPES
    • CONTACT ME/WORK WITH ME!
    • FAQS
    • PRIVACY POLICY

    • Facebook
    • Pinterest
    • Twitter

    Copyright © 2025 Rants From My Crazy Kitchen

    Enter your name and email address to subscribe by email
    Stay up to date on all the latest recipes, reviews, giveaways, and more for free!

    Your privacy is important! Please refer to Rants From My Crazy Kitchen's Privacy Policy for information how we use your information and protect your rights.

    Rate This Recipe

    Your vote:


    A rating is required
    A name is required
    An email is required