• Skip to primary navigation
  • Skip to main content
  • Skip to primary sidebar
  • Home
  • FAQS
  • Privacy Policy

Rants From My Crazy Kitchen logo

  • About
  • Recipe Index
  • Contact Me/Work With Me!
menu icon
go to homepage
search icon
Homepage link
  • Home
  • FAQS
  • Privacy Policy
  • Follow Me!

    • Facebook
    • Pinterest
    • Twitter
  • ×
    Home » Recipes

    Recipes

    Chilled Chickpea Soup

    September 6, 2014

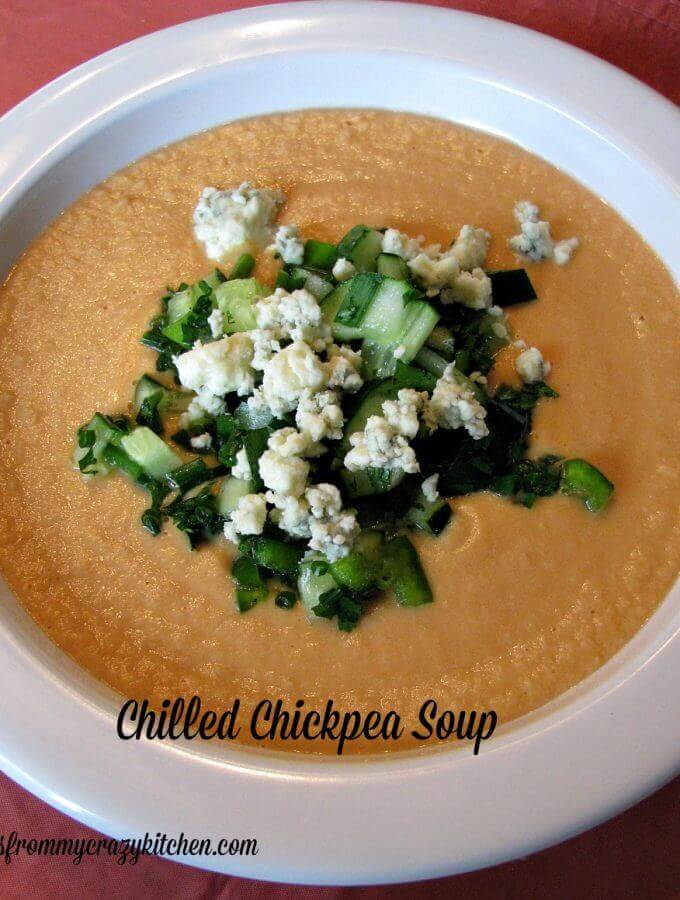
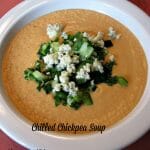
    I think now would be the perfect time to share one last really summery recipe, with this Chilled Chickpea Soup. Great for hot days, the pureed chickpeas make this a filling soup that won't leave you hungry!

    Chilled-Chickpea-Soup


    This really isn't the last summery recipe since I have tons of fresh produce to use, but this one is a middle of summer, it's 95 degrees out type of recipe! I'm sure it's still 95 in a bunch of places right now.

    I made this a while back after seeing it on Pinterest and realizing I already had most of the ingredients on hand, and could easily change the rest. It was a great way to use some of the vegetables from my garden. I don't make chilled soups all that often, with the exception of Bacon Gazpacho which has just recently become a favorite, but I've been looking for new ways to use up the vegetables from the garden and my CSA. They are everywhere!

    I love hummus and this soup is just like a thinned out hummus with chunky vegetables in it, then topped with blue cheese or feta cheese. Or really, any kind of cheese you like as long as it's a soft, crumbly cheese.

    Print Recipe
    No ratings yet

    Chilled Chickpea Soup

    Creamy chickpeas, chunky vegetables, tahini, and crumbled cheese combine to make this fabulously filling chilled soup!
    Prep Time25 minutes mins
    Total Time25 minutes mins
    Course: Soup
    Servings: 6
    Calories: 174kcal
    Author: Bernadette

    Ingredients

    • 2 15.5 ounce cans chickpeas ,drained and rinsed well
    • 1 cup chopped fresh tomatoes
    • 1 cup chopped cucumber
    • 1 cup water ,or more, depending on desired consistency
    • ½ cup crumbled blue cheese
    • ¼ cup chopped green pepper
    • ¼ cup chopped chives
    • ⅛ cup chopped cilantro
    • ⅛ cup chopped parsley
    • 1 clove garlic ,minced
    • 3 tablespoons lemon juice
    • 2-3 tablespoon tahini
    • 1 tablespoon extra virgin olive oil
    • ¼ teaspoon ground cumin
    • salt and fresh ground pepper ,to taste

    Instructions

    • Combine the chopped tomatoes, cucumber, chives, parsley, and cilantro in a bowl along with a dash of salt and pepper.
    • In a blender, combine the drained and rinsed chickpeas, lemon juice, tahini, garlic, olive oil and another dash of salt and pepper. Add water, starting with one cup, and blend until smooth and thin enough to pour. Taste and adjust seasoning, if needed. Pour into bowls, top with the vegetable mixture, and sprinkle crumbled blue cheese on top.

    Notes

    Adapted from The New York TImes

    Nutrition

    Calories: 174kcal | Carbohydrates: 15g | Protein: 7g | Fat: 9g | Saturated Fat: 2g | Cholesterol: 8mg | Sodium: 393mg | Potassium: 285mg | Fiber: 4g | Sugar: 1g | Vitamin A: 545IU | Vitamin C: 15mg | Calcium: 103mg | Iron: 1.5mg


    Bacon Gouda Stuffed Bell Peppers

    August 31, 2014

    Bacon Month 2014 Square 800


    #BaconMonth is coming to an end. No more bacon recipes. Ever. How sad. Just kidding! Of course there will be bacon recipes, just not twice a week. Haha! Bacon Month has been hosted by the amazing Julie of White Lights on Wednesday with a new bacon focused cookbook giveaway each week. The final giveaway is for a copy of The Bacon Cookbook. You can enter below, but first let me tell you about what I made for today!

    I was torn on what to make for the final recipe. I knew I wanted to do something with bell peppers, but couldn't decide whether I wanted it to be an entree or an appetizer, spicy or mild, or which cheese to use. So I turned to my Facebook page and asked my followers: Bell peppers stuffed with chorizo, bacon, and goat cheese (entree) OR bell pepper stuffed with bacon and Gouda cheese (appetizer)? All but one said the recipe I am sharing today! I LOVE my Facebook fans, when they get to see my posts that is.


    Bacon-Gouda-Stuffed-Bell-Peppers-2


    These stuffed peppers are extremely mild compared to what I would normally make, so they would be great for a party with a group of people that don't like spicy foods, or for kids. They are also really easy to make, just 5 ingredients including seasoning. You'll want to serve them hot, but not right out of the oven, so if you are making a bunch for a party I would keep them warm in a 200 degree oven.

    Baked-Bell-Peppers-with-Bacon-and-Gouda


    Gouda cheese doesn't melt in the oven like some other cheeses, instead it gives the peppers a crispy baked cheese topping. If you're like me and would like to add a little bit of spice to them, add just a pinch of cayenne pepper to the cheese mixture.

    Giveaway info:  Giveaways are open to US and Canadian residents.  Canadian residents will receive an amazon.com egiftcard in the amount of the book's price.  Winners will be announced within 48 hours, and will have 48 hours to claim prize, must be 18+, and entries will be verifies (no "giveaway accounts"). 

    a Rafflecopter giveaway

    Bacon-Gouda-Stuffed-Bell-Peppersjpg

    Print Recipe
    No ratings yet

    Bacon Gouda Stuffed Bell Peppers

    Sweet bell peppers stuffed with a simple mixture of bacon and Gouda cheese. Great for the mild-loving crowd, or add a pinch of cayenne for heat!
    Prep Time15 minutes mins
    Cook Time15 minutes mins
    Total Time30 minutes mins
    Course: Appetizer
    Servings: 32
    Calories: 131kcal
    Author: Bernadette

    Ingredients

    • 8 small/medium green bell peppers
    • 1 pound bacon
    • 3 cups finely shredded aged Gouda cheese
    • ⅓ teaspoon garlic powder
    • ⅓ teaspoon black pepper

    Instructions

    • Cook bacon in a large pan over medium-high heat until crispy. Drain on paper towels then crumble. Preheat oven to 425 degrees F.
    • Slice each pepper in half, remove the seeds and thick membranes, then slice each half in half again.
    • In a medium bowl, combine the shredded Gouda, garlic powder, and black pepper. Toss with your hands to mix.
    • Place a little crumbled bacon in the middle of each slice of pepper, top with a pinch of cheese mixture to cover. Place on a parchment paper lined large baking sheet. Bake in the preheated oven for 13-15 minutes or until cheese is golden and peppers are sizzling. Serve warm.

    Nutrition

    Calories: 131kcal | Carbohydrates: 2g | Protein: 6g | Fat: 10g | Saturated Fat: 5g | Cholesterol: 30mg | Sodium: 246mg | Potassium: 102mg | Sugar: 1g | Vitamin A: 210IU | Vitamin C: 32.8mg | Calcium: 133mg | Iron: 0.2mg

    Check out the final recipes made for Bacon Month!

    An InLinkz Link-up


    Pineapple Cherry Dump Cake -Guest Post from Jodi Ambrose

    August 29, 2014

    Can you believe Labor Day is just three days away? I can't even believe school started already, much less Fall is right around the corner. Ugh, just about the only thing I like about fall is pumpkin. Never mind, forget that, let's talk about Labor Day cookouts! A few days ago my friend Jodi shared her mom's recipe for Macaroni Salad here, and she's back today with another recipe. I have to admit I've never made a dump cake in my life, but this sounds good and REALLY easy! I would love it if you would check out Jodi on Jodi Ambrose Blog but I have to warn you, she's kind of racy, and funny! She's not a food writer, either, well minus the fact that she wrote a  cookbook ;). That two of my recipes are in, and I love the title of, Darn Good Eats: The Cookbook for Creative Chefs and Reluctant Cooks. Randomly, most days I'm both! I'll leave you to Jodi now, enjoy!


    Those of you who know me, know that while I have a million great recipes, most of them are too complicated for me to make—so I rely on the hubby to cook them.

    Alas, this one even I can make. Anyone could make it. I mean that seriously. If you blindfolded yourself and tied one hand behind your back, and had 4 shots of vodka, you could still easily make this and not mess it up. Hence why it is the perfect recipe for me!

    Again, this is one of mom’s recipes. She’s always been the most amazing cook so I’ve pilfered quite a few from her over the years.

    I hope you love this as much as I do.

    Mom’s Pineapple Cherry Dump Cake

    (Though it should be called “Goodies swamped in butter” as that may be a more accurate title!)


    Pineapple Cherry Dump Cake

    Image credit Tammille Tips

    The list of yum yums:

    One 18- to 20-ounce can of cherry pie filling—the extra cherry kind if possible
    1 - 1½ sticks of butter
    One 20-ounce can of un-drained pineapple rings
    1 box of yellow cake mix

    Dumping it all together:
    Preheat the oven to 350 °F.
    Butter the bottom and sides of a 9x13 glass dish.
    Place a single layer of pineapple rings on the bottom of the dish and pour the juice over the pineapple.
    Pour the can of cherry pie filling on top of the pineapple and spread so the cherries are distributed evenly.
    Pour the dry yellow cake mix over the pineapple and cherries and level it out. Don't mash the cake mix, just gently level it out and make sure it’s evenly dispersed.
    The take a stick or stick and a half of butter, slice it into ⅛-inch thick slices and put it over the entire cake top about an inch apart.
    Bake at 350 °F for about an hour or until the top is crispy brown.

    I can't even begin to describe how tasty this cake is. And seriously, have you ever read an easier cake recipe? It’s even easier than boxed cake. I would serve this cake to a chef. A president. A Nobel Prize winner. There is no shame in serving this cake to anyone and everyone. It may have taken you 3 minutes to make it, but no one would ever guess that in a million years. It is absolutely fantastic.
    I hope you love these two recipes. They’ve been staples in my home for many decades and are always crowd favorites. Plus, they are super easy and don’t take much time, which gives you just that much more of your weekend to enjoy spending with friends.
    One final thing: A HUGE, heartfelt thanks to Bernadette for inviting me to write a guest post for her amazing blog! I love her recipes and her! She’s always such a bright spot for me and I’ve made quite a few of her delicious concoctions (well, the hubby has made most of them!) and have loved each and every one of them.
    I’m delighted to be able to share two of my favorite family recipes with her wonderful readers.
    Take care and enjoy the yum yums!
    Jodi Ambrose
    www.jodiambroseblog.com
    www.jodiambrose.com


    DISCLAIMER: This recipe is credited to Jodi Ambrose (and her mom, of course!). The photo is credited to Tammilee Tips due to Jodi’s camera not working. Rants From My Crazy Kitchen makes no claim to the photo. 

    Huevos Rancheros with Bacon Tortillas

    August 28, 2014

    Huevos Rancheros with Bacon Tortillas

    Welcome to the last week of #BaconMonth! I hope you found some great new recipes this month thanks to Julie at White Lights On Wednesday.  I have to say I'm particularly fond of this one. I love sunny side up eggs, and Mexican foods! I adapted this recipe from one I found in the September 2014 issue of Food Network Magazine. The original recipe called for broiling the tomatoes for the salsa until charred first, but the tomatoes from my garden weren't exactly perfect so I decided to skip that part and chop them instead. The salsa does take a while to make, so make it a day ahead if you can, and then reheat over low heat right before serving. Since it's #BaconMonth I also decided to add a little extra bacon to the tortillas, which made the dough a little more crumbly, and I had to be careful when turning them while frying. I do think the tortillas are a little thick when made as directed, but my husband doesn't think so. Try frying one and if you think it's too thick just flatten the rest a little thinner.


    Huevos Rancheros with Bacon Tortillas


    For the final week of Bacon Month a copy of The Bacon Cookbook is up for grabs! It looks good, okay I mean anything with bacon looks good to me, but I'm sure you will like it, too! Contest is open to US and Canadian residents 18 and older. Canadian resident will receive an amazon.com egiftcard in the amount of the book's price.  Winners will be announced within 48 hours, and will have 48 hours to claim prize, and entries will be verifies (no "giveaway accounts").

    a Rafflecopter giveaway


    Print Recipe
    No ratings yet

    Huevos Rancheros with Bacon Tortillas

    Prep Time45 minutes mins
    Cook Time35 minutes mins
    Total Time1 hour hr 20 minutes mins
    Course: Entree
    Cuisine: Mexican American
    Servings: 4
    Calories: 610kcal
    Author: Bernadette

    Ingredients

    • For the salsa:
    • 3 cups chopped tomatoes
    • 2 cherry hot peppers ,diced
    • 2 cloves garlic ,minced
    • ½ cup chopped red onion'
    • ½ cup chopped green pepper
    • ¼ cup chopped cilantro
    • 2 tablespoons extra light olive oil
    • ½ teaspoon salt
    • For the Tortillas:
    • 8 slices smoked bacon
    • 1 cup masa harina (instant corn flour)
    • ¾ cup warm water
    • 2 tablespoons vegetable oil
    • pinch Kosher salt
    • For the eggs:
    • 4 large eggs
    • ½ cup finely diced pepper jack cheese
    • 1 tablespoon vegetable oil

    Instructions

    • For the salsa:
    • Combine the chopped vegetables in a large pot along with the olive oil, cilantro, and salt. Bring to a boil, and cook, stirring occasionally, for 10 minutes. Cover and set aside if continuing with the recipe, or allow to cool and refrigerate in a covered container until the next day, then reheat over low heat right before serving.
    • For the tortillas:
    • Cook the bacon in a large nonstick skillet over medium-high heat until crisp, drain on paper towels, and crumble. Reserve bacon grease in the pan. In a medium bowl, combine all but about a tablespoon of the bacon, masa harina, and a pinch of Kosher salt.Stir in the warm water and knead until the dough is soft, about two minutes. Divide the dough into 4 pieces; roll each into a ball, then flatten into 4-inch round disks.
    • Heat the vegetable oil in a cast iron skillet over medium-high heat. Add the tortillas and cook for about 4 minutes, until golden brown on the bottoms. Turn carefully and cook for about 3 more minutes. Turn again and cook until browned and cooked through, about 1 minute. Remove from pan and wrap in foil to keep warm.
    • For the eggs:
    • Add the vegetable oil to the bacon grease in the nonstick pan and return to the stove over medium heat. Add the eggs and fry until the whites are set, 3-5 minutes.
    • Spoon a little of the salsa onto four plates. Place a tortilla on each plate and top with an egg. Top with additional salsa, reserved bacon, and finely diced pepper jack. Serve immediately.

    Nutrition

    Calories: 610kcal | Carbohydrates: 33g | Protein: 20g | Fat: 45g | Saturated Fat: 19g | Cholesterol: 227mg | Sodium: 993mg | Potassium: 685mg | Fiber: 4g | Sugar: 6g | Vitamin A: 1015IU | Vitamin C: 64.8mg | Calcium: 234mg | Iron: 5.3mg


    Check out all the great recipes being shared this week!

    An InLinkz Link-up


    Slow Cooker Broccoli Au Gratin

    August 27, 2014

    I was invited to guest post on my friend Christina's blog, It's A Keeper, for her Slow Cooker Summer Series!


    Slow Cookin Summer: Easy Recipes for a Slow Cooker on It's a Keeper


    With all the produce I've been getting from my CSA, I decided I should try Broccoli Au Gratin, but I couldn't find one single recipe for it made in the slow cooker anywhere. Not in cookbooks, Google search, Pinterest, nowhere, and to be completely honest, I had never even made it in the oven like normal. So, I invented it!!

    Broccoli-Au-Gratin


    I would love for you to head over and check out my post, and while you're there, check out all the other great slow cooker recipes that were shared this summer! You can find my post by clicking here> Slow Cooker Broccoli Au Gratin and I'll be back twice more this week for the final week of #BaconMonth, I can't wait for you to see what I made tonight!

    Mom's Macaroni Salad -Guest Post From Jodi Ambrose

    August 26, 2014

    Well, my daughter started Kindergarten yesterday, and I have a little announcement to make. For now, I've decided not to go back to work outside of home full time, but instead I am going to be food blogging/recipe developing full time! This means lots of new recipes to share with all of you in the coming months! But first, I have to get myself into a schedule and there isn't any school on Friday or Monday for Labor Day and next week I desperately need to audit myself. You see, I've been making some money from sponsored posts and the ads on this blog this year, but I have done a horrible job of keeping track of what I made from where and what I spent where! I am extremely grateful for my guest poster this week, Jodi Ambrose, she's has brought two recipes to share with you this week! Jodi isn't a food blogger, we "met" through our blogs, I think her's is fabulous! Check out Jodi Ambrose Blog. Then she wrote a cookbook and asked me to contribute, which was great! Today she is sharing her mom's macaroni salad recipe, and it sounds fabulous! Here's Jodi.


    With Labor Day less than a week away, I thought I’d share with you my two easiest-to-make foods that go great with whatever you might be throwing on the grill.
    The first is the absolute, hands-down best macaroni salad I’ve ever eaten. It’s mom’s recipe and I’ve enjoyed it every summer since I was a little girl.
    One of my favorite things about this salad is that it doesn't have a bunch of weird junk in it. I think sometimes people get so obsessed with making food all fancy and complicated that they lose sight of what makes it taste so good—simplicity.
    This salad has a clean, crisp, summer taste to it. It is one of my all-time favorite things to eat while sitting in the backyard and watching the chickens play as the sun goes down.

    Mom's Macaroni Salad


    macaroni salad

     Image credit Gourmet Kosher Cooking  

    Stuff you'll need:
    1 one-pound box of elbow macaroni
    ½ - 1 green pepper
    4 good-sized tomatoes
    1 large cucumber
    ½ - 1 medium-sized, sweet onion, depending on how onion-y you like stuff. Don't use a yellow or red, they are way too potent—look on the label of the onion for the word "sweet". If you can’t find a sweet onion, look for the flattest, squished looking onion you can find. As the produce wizard at the store shared with me, the flat onions are sweeter than the round ones, so go with that if you need to.
    ¾ - 1 cup of mayonnaise* (maybe more)
    Salt and pepper, to taste
    *I use Kraft Mayo with Olive Oil™ as I can’t tell the difference between it and regular mayo, but it has way fewer calories and less fat than the regular kind.

    Putting it all together:
    1. Cook the macaroni according to the directions on the box.
    2. Once it's cooked (don't overcook it) dump it into a colander and thoroughly rinse it with cool water.
    3. Empty the macaroni into a large bowl.
    4. Cut the tomatoes into small, bite-sized pieces and add to the bowl.
    5. Peel the cucumber and cut into small, bite-sized pieces and add to the bowl.
    6. Cut the green pepper into large chunks (I do this because I don't want to bite down on a piece of green pepper, so keeping the chunks large helps me avoid actually eating one, but it does add a nice flavor to the salad—you can cut it any way you want) and add to the bowl.
    7. Dice the onion into very small pieces (you don't want any big bites of onion either, but you do actually want onion in your mouth) and add to the bowl.
    8. Add about ½ the mayonnaise and stir. Continue to add the mayo until it's got enough for you. Some people like tons of it, some people don't.
    9. Add salt and pepper. Taste it. Add more salt and pepper as necessary.
    10. Refrigerate for at least a couple of hours so everything has time to chill. If you can, refrigerate it overnight. It is at its absolute best on the second day.
    11. Before serving, make sure to stir and taste-test it one more time to make sure it has enough salt. It will be bland if it doesn't have enough salt.

    You can also find Jodi here, you might want to order her cookbook!

    www.jodiambrose.com


    DISCLAIMER: This recipe is credited to Jodi Ambrose (and her mom, of course!). The photo is credited to Gourmet Kosher Cooking due to Jodi's camera not working. Rants From My Crazy Kitchen makes no claim to the photo. 

    Easy Strawberry Honey Spinach Smoothie/Recipes For Back to School

    August 25, 2014

    This shop has been compensated by Collective Bias and it's advertiser, Price Chopper. All opinions are mine alone.

    My 5 year old daughter started Kindergarten today! Many other kids are going back to school this week, and everything is hectic. She has been getting lunch at preschool for the past two years, but now I'm faced with school lunches five days a week. This is a problem since I have the world's pickiest eater! I feel like I've said that before...because I have. Luck for me Price Chopper Supermarkets , just a few blocks from me, has everything I need for my picky eater and quick and easy recipes. So, I headed out for everything I needed for lunch and snacks for the first week of school.

    Hillshire-Lunch-Meat

    Full disclosure, I shop at Price Chopper more than anywhere else, and find good savings on their Facebook page. I'm also an Advantage Card member, which gets me savings not only in store but on gas. Everybody needs to save money, especially me!

    I started thinking about what my daughter would actually eat for lunch. Although she is extremely picky, she does like avocado,  cheese, yogurt, and even spinach! So I decided a turkey sandwich made with Hillshire Farm Naturals Slow Roasted Turkey, Colby jack cheese (it's mild and colorful so kids like it!), and avocado on whole wheat bread, along with an easy smoothie made with flavored Yoplait yogurt and spinach would be great.

    Yoplait-Isle


    I knew she would like the sandwich. I tried convincing her to let me put tomato on it, but she wouldn't have it. I should also mention that she doesn't like anything on sandwiches, no mayo, mustard, anything. Of course every kid is different, that's why I'm not including a "recipe" for the sandwich, just add whatever your kid will eat.


    Hillshire-Naturals-Turkey-Colby-Jack-Avocado


    I wasn't so sure about the smoothie. She does like all of the ingredients, but I didn't know how she would feel about them blended together. She drank some, said she doesn't like it, drank some more without me asking her to, said she doesn't like it again, but kept drinking it. She even took it over her grandmothers to finish! So, I guess she liked it, and was just complaining because she can.


    Strawberry Honey Spinach Smoothie


    See, here's proof!

    Enjoying-Turkey-Sandwich


    Thanks to #CollectiveBias for the opportunity to try new recipes with my daughter. With #PriceChopperB2S I'm sure I'll find many more great recipes to try. From August 17 to September 20, 2014 you can submit a "Back to School" photo on the Price Chopper and then you can vote on your favorite from September 21 to September 27. The top 5 AND 5 random winners will each receive an IPad Mini!  You can also find Price Chopper on Twitter, Instagram, YouTube, and on their Back to School Pinterest page.

    This smoothie is light green, so it's not scary for kids. If you have fresh strawberries on hand, pop them in for more pink! For more green (my daughter's favorite color), simply add about a cup more spinach.


    Strawberry Honey Spinach Smoothie Ingredients


    Print Recipe
    4 from 1 vote

    Easy Strawberry Honey Spinach Smoothie/Recipes For Back to School

    Simple smoothie made with flavored yogurt and spinach, great for kids lunches!
    Course: Beverage
    Calories: 389kcal
    Author: Bernadette

    Ingredients

    • 3 cups baby spinach ,washed and dried
    • 1- 5.3 ounce container strawberry Yoplait Greek 100 Calories Yogurt
    • 1- 5.3 ounce Yoplait Honey 2% Milkfat Yogurt
    • 1 cup milk
    • 1 cup ice

    Instructions

    • Add both yogurts, milk and ice to a blender. Add a large handful of spinach and blend slightly to reduce spinach. Add remaining spinach and blend until smooth. Serve cold.

    Nutrition

    Calories: 389kcal | Carbohydrates: 47g | Protein: 31g | Fat: 10g | Saturated Fat: 6g | Cholesterol: 39mg | Sodium: 271mg | Potassium: 824mg | Fiber: 1g | Sugar: 37g | Vitamin A: 9335IU | Vitamin C: 25.2mg | Calcium: 565mg | Iron: 6mg


    Spicy Shrimp and Bacon Casserole

    August 23, 2014

    Spicy Shrimp and Bacon Casserole

    Bacon Month 2014 Square 800


    Oh my gosh! #BaconMonth is almost over, my daughter starts Kindergarten in two days, and summer is pretty much over! How did that happen? If you've been as busy as I have and missed hearing about Bacon Month hosted by Julie from White Lights on Wednesday, 1. That's a tragedy. 2. You still have time to enter this weeks giveaway, BUT it ends tomorrow night, August 24th, at midnight, so hurry! Details on the giveaway below!

    So, I love seafood, I clearly love bacon, and I love spicy foods, so I thought that this spicy shrimp casserole loaded with bacon would be perfect for Bacon Month. Shrimp baked in a creamy sauce of jalapenos and red chilies, topped with bacon and panko breadcrumbs, what could be better!


    Spicy Shrimp and Bacon Casserole


    Great as an entree for a special occasion, this dish would also make a wonderful first course. My husband hasn't tried it yet, but I'm sure he's going to love it. I can see making this for his birthday, or maybe I'll make him make it for me for my birthday next year.

    Giveaway details: This week you can enter to win a copy of the cookbook Seduced By Bacon. Open to US and Canadian residents.  Canadian residents will receive an amazon.com egiftcard in the amount of the book's price.  Winners will be announced within 48 hours, and will have 48 hours to claim prize, must be 18+, and entries will be verifies (no "giveaway accounts").

    a Rafflecopter giveaway

    Highly adapted from Project Foodie.

    Print Recipe
    3 from 1 vote

    Spicy Shrimp and Bacon Casserole

    Baked shrimp and bacon casserole in a creamy jalapeno and red chilies sauce. Makes a great special occasion entree or divide into small ramekins for a fabulous starter course!
    Prep Time20 minutes mins
    Cook Time35 minutes mins
    Total Time55 minutes mins
    Course: Entree
    Servings: 6
    Calories: 517kcal
    Author: Bernadette

    Ingredients

    • 1 pound shrimp , large (16-20 count) raw shrimp, peeled, deveined, and tails removed
    • 10 slices hardwood smoked bacon cooked and coarsely crumbled
    • 1 tablespoon finely chopped jalapenos (if you want it spicy leave a few seeds in)
    • 1 teaspoon finely chopped red chilies
    • 1 cup panko breadcrumbs
    • 4 tablespoons butter ,melted
    • 1 ½ cups light cream
    • ½ cup lobster juice (can substitute clam juice)

    Instructions

    • Preheat oven to 350 degrees F. Cook bacon until crisp, drain and coarsely crumble.
    • Lightly grease a 1 ½ quart casserole dish with butter. Stir together panko breadcrumbs, butter, and salt and pepper to taste. Spoon half the breadcrumb mixture into the bottom of the casserole dish in a thin layer, place the shrimp on top, followed by the crumbled bacon. Stir together the light cream, lobster or clam juice, and diced jalapenos and chilies, pour over the shrimp/bacon mixture. Top with remaining breadcrumbs. Bake in the preheated oven for 35 minutes, or until bubbly and lightly browned.

    Notes

    Inspired byi] Pig: King of the Southern Table[/i] and found on[ Project Foodie

    Nutrition

    Calories: 517kcal | Carbohydrates: 11g | Protein: 22g | Fat: 42g | Saturated Fat: 21g | Cholesterol: 301mg | Sodium: 1040mg | Potassium: 230mg | Sugar: 1g | Vitamin A: 895IU | Vitamin C: 8.9mg | Calcium: 173mg | Iron: 2.3mg

    Check out all the other great recipes made this week!

    An InLinkz Link-up


    Ultimate Grilled Bacon Tuna Sandwich

    August 19, 2014

    Disclamier: Bumble Bee supplied me with product and compensation for this post. The recipe and my opinions are my own.

    The last few days before school starts are upon us, and of course I have 6 million and one things to do! I know that won't change once school starts either, things for us and millions of others are only going to get more hectic. I personally know that when things get hectic, getting dinner on the table can be a challenge, and your looking for something quick and easy, yet delicious. It happened here just the other day! Then I thought of an easy tuna recipe, using a can of Chipotle and Olive Oil Albacore Tuna I had been sent. Bumble Bee is helping us find great ideas for Back to School with their #BumbleBee101 campaign, and we could all use them, right? By the way, I never heard of canned tuna with anything else in it, what a great idea! Hint to stores around me, start carrying it!


    Bumble-Bee-Albacore-w-Chipotle-and-Olive-Oil


    So the recipe I thought of fit right in with #BaconMonth, is kid friendly, quick, easy, and boy is it delicious! Okay, full honesty here, my daughter won't eat tuna in any way, shape, or form. It started as a joke one morning months ago when she wouldn't answer me as to what she wanted to eat, and really just wasn't paying attention to me at all. So my husband said to her "How about tuna?" and she, still not paying attention, said "With no milk". So, my husband said "Okay, Mom, tuna in a bowl, with no milk!" THEN she paid attention, screaming NO, NO, NO!! She had never had tuna at that point and refuses to even try it now. So, while I'm sure this sandwich IS kid-friendly, just not my kid. In fact that applies to most things, not my kid. I'm used to it by now.


    Ultimate-Bacon-Grilled-Tuna-Sandwich


    Print Recipe
    No ratings yet

    Ultimate Grilled Bacon Tuna Sandwich

    Smoky Chipotle and Olive Oil tuna mixed with bacon, topped with kale and sliced tomato, and loaded with cheese for a quick, kid-friendly, simple meal solution!
    Prep Time5 minutes mins
    Cook Time15 minutes mins
    Total Time20 minutes mins
    Course: Sandwich
    Servings: 2
    Calories: 670kcal
    Author: Bernadette

    Ingredients

    • 5 ounce can Bumble Bee Albacore Tuna with Chipotle and Olive Oil
    • 4-6 large slices hardwood smoked bacon
    • 4 slices American cheese
    • 4 slices bread of choice (I use whole grain white because it's kid-friendly)
    • kale or spinach ,cut into pieces to fit
    • 2 slices tomato

    Instructions

    • In a flat grill pan cook the bacon over medium-high heat until crisp, drain and crumble. Reserve bacon grease in the pan.
    • Combine crumbled bacon and drained tuna in a small bowl,breaking up the larger pieces of tuna. Place two pieces of cheese on each piece of bread, top each with an equal amount of tuna/bacon mixture, then top with remaining cheese, kale or spinach, and sliced tomato.
    • Preheat oven to 350 degrees. Return the pan to medium heat. Grill the sandwiches until just browned on both sides, turning carefully, then place on a baking sheet and bake just until the cheese is melted, 5 minutes or less.

    Nutrition

    Calories: 670kcal | Carbohydrates: 32g | Protein: 34g | Fat: 44g | Saturated Fat: 15g | Polyunsaturated Fat: 1g | Cholesterol: 96mg | Sodium: 1610mg | Potassium: 308mg | Fiber: 2g | Sugar: 6g | Vitamin A: 870IU | Vitamin C: 3.7mg | Calcium: 541mg | Iron: 2.4mg


    This week all the #BaconMonth bloggers are giving away a copy of Seduced by Bacon. You can enter this weeks giveaway and check out some previous great recipes with bacon on my Bacon Month on RFMCK post and be sure to check out all the other great recipes being shared this week below!

    An InLinkz Link-up


    Bacon Cream Cheese Stuffed Cherry Tomatoes

    August 15, 2014

    Photo of Bacon Cream Cheese Stuffed Cherry Tomatoes in a glass plate on a rod iron table

    Cherry tomatoes stuffed with cream cheese, bacon, and fresh herbs, these Bacon Cream Cheese Stuffed Cherry Tomatoes make a great summertime party appetizer.


    Bacon-Month-2014-Square-500-300x300


    Welcome back to #BaconMonth hosted by Julie from White Lights on Wednesday. All month of August long a fabulous group of foodies are sharing recipes focusing on bacon, which if you haven't figured it out by now is one of my favorite foods, and giving away cookbooks focusing that very food!

    I could bet that at least a third of the recipes I've posted in the last two and half (almost) years have bacon in them. Seriously, I may have a problem.

    Bacon Cream Cheese Stuffed Cherry Tomatoes 

    Bacon-Cream-Cheese-Stuffed-Cherry-Tomatoes


    These stuffed cherry tomatoes were made with tomatoes from my garden. I used regular Philadelphia cream cheese when I made them, but later on I thought using whipped cream cheese would also be good. My husband then mentioned that I could have used store bought chive cream cheese , so if you want to make these stuffed cherry tomatoes but don't have chives and don't want to buy them, go right ahead and use that.

    You could try other flavored cream cheeses, too, just try to find one that complements the bacon, because the bacon is the most important part!

    This giveaway has ended. Read on after the cherry tomato appetizer recipe to see the link to all the other great bacon recipes shared.

    Photo of Bacon Cream Cheese Stuffed Cherry Tomatoes in a glass plate on a rod iron table
    Print Recipe
    3.68 from 31 votes

    Bacon Cream Cheese Stuffed Cherry Tomatoes

    Cherry tomatoes stuffed with cream cheese, bacon, and fresh herbs make a great summertime party appetizer.
    Prep Time20 minutes mins
    Cook Time8 minutes mins
    Total Time28 minutes mins
    Course: Appetizer
    Cuisine: American
    Keyword: cherry tomato appetizers, stuffed tomato appetizers, summertime appetizers
    Servings: 20
    Calories: 103kcal
    Author: Bernadette

    Ingredients

    • 20 cherry tomatoes
    • 12 ounces hardwood smoked bacon ,cooked and crumbled, reserve some for topping
    • 6 ounces cream cheese (or 6 ounces whipped cream cheese)
    • 1 tablespoon chives , chopped fine
    • 1 tablespoon chopped basil
    • garlic salt , to taste
    • ⅛ teaspoon fresh ground black pepper
    • parsley for garnish (optional)

    Instructions

    • Bring cream cheese to room temperature. Using a sharp pointed knife, cut just the tops off the cherry tomatoes, carefully scoop out the seeds, being careful not to go all the way through the tomatoes. Invert the cut and seeded tomatoes onto paper towel and let stand for at least 10 minutes.
    • In a small bowl, combine cream cheese, chives, basil, fresh ground black pepper, and a sprinkle of garlic salt. Mix well, then stir in bacon.
    • Lightly sprinkle the cherry tomatoes with garlic salt, then stuff the tomatoes with the bacon/cream cheese mixture using a small spoon. Garnish with reserved bacon and parsley (if desired) Chill until serving.

    Nutrition

    Calories: 103kcal | Carbohydrates: 1g | Protein: 2g | Fat: 9g | Saturated Fat: 3g | Cholesterol: 20mg | Sodium: 141mg | Potassium: 82mg | Vitamin A: 215IU | Vitamin C: 4mg | Calcium: 11mg | Iron: 0.2mg


    An InLinkz Link-up


    • « Go to Previous Page
    • Page 1
    • Interim pages omitted …
    • Page 27
    • Page 28
    • Page 29
    • Page 30
    • Page 31
    • Interim pages omitted …
    • Page 44
    • Go to Next Page »

    Secondary Sidebar

    Archives

    Browse by category

    • Appetizers (38)
    • Beef (24)
    • Breads (4)
    • Breakfast/Brunch (29)
    • Broths/Stocks (1)
    • Candy (1)
    • Casseroles (5)
    • Cauliflower (3)
    • Cheese (14)
    • Chicken (49)
    • Chocolate (13)
    • Christmas (14)
    • Cocktails/Beverages (7)
    • Cookies (7)
    • Crock Pot (8)
    • Cupcakes (2)
    • Desserts (41)
    • Dinner (20)
    • Dips (11)
    • Fruit (4)
    • Grilled (7)
    • Ham (6)
    • Healthy Recipes (3)
    • Instant Pot/Pressure Cooker (2)
    • Main Courses/Entrées (79)
    • Meats (8)
    • Pasta (29)
    • Pickles (1)
    • Pizza (8)
    • PKU Friendly (5)
    • Pork (13)
    • Potatoes (11)
    • Salads (14)
    • Sandwiches (4)
    • Sauces (11)
    • Savory Pies (3)
    • Seafood/Shellfish (38)
    • Side Dishes (19)
    • Slow Cooker (12)
    • Smoothies (1)
    • Snacks (1)
    • Soups/Stews (43)
    • Thanksgiving (8)
    • Tomatoes (4)
    • Turkey (11)
    • Vegan (10)
    • Vegetables (21)

    Footer

    ↑ back to top

    • ABOUT
    • RECIPES
    • CONTACT ME/WORK WITH ME!
    • FAQS
    • PRIVACY POLICY

    • Facebook
    • Pinterest
    • Twitter

    Copyright © 2025 Rants From My Crazy Kitchen

    Enter your name and email address to subscribe by email
    Stay up to date on all the latest recipes, reviews, giveaways, and more for free!

    Your privacy is important! Please refer to Rants From My Crazy Kitchen's Privacy Policy for information how we use your information and protect your rights.

    Rate This Recipe

    Your vote:


    A rating is required
    A name is required
    An email is required