• Skip to primary navigation
  • Skip to main content
  • Skip to primary sidebar
  • Home
  • FAQS
  • Privacy Policy

Rants From My Crazy Kitchen logo

  • About
  • Recipe Index
  • Contact Me/Work With Me!
menu icon
go to homepage
search icon
Homepage link
  • Home
  • FAQS
  • Privacy Policy
  • Follow Me!

    • Facebook
    • Pinterest
    • Twitter
  • ×
    Home » Recipes

    Recipes

    Fire and Ice on Toby Creek Restaurant Review

    July 10, 2014

    My husband and I go out for dinner every year for our anniversary. I like to go to locally owned, nice restaurants, and have visited Fire and Ice on Toby Creek twice before. Located at 111 South Main St. in Trucksville, PA, Fire and Ice on Toby Creek is co-owned and managed by Chef Gary Edwards, his wife Lisa, Joe Fasula, and Sandy Fasula and features fine dining in a casual atmosphere with an emphasis on local products.

    I have to apologize for two things. The first is this review is a long time coming. You see, our anniversary was May 20th, and we visited the restaurant on May 17th. The second thing is the terrible quality of the photos I took that night. Not thinking of photography when we were seated, we sat in the location of a red heat lamp, in a dimly lit restaurant, in the evening. I was using my phone, and all of the pictures came out grainy. If you can ignore the photos, however, I think my description of the service and, more importantly, the food, will tell you why Fire and Ice is one of my favorite places to dine!

    Reservations are not necessary, although they do accept them (call 570-696-3580), and we had a hard time deciding where to go that night, so we didn't make them. When we pulled in to the parking lot, it was packed. Turns out I'm a moron and didn't realize there were several college graduations that day! My husband sighed (he hates waiting but knew I wanted to go there), and we went in to see just how long it was going to be. The host asked if we had a reservation, I said no, and he simply said "Let me see if I have a table open". There were tables full of college graduates and their families. We were seated within two minutes.

    The menu at Fire and Ice on Toby Creek varies by the season, and they have daily specials to choose from. Late May meant the beginning of the Summer Menu.

    I let my husband choose the wine, and we ordered the Creamy Crab and Herb Dipper as an appetizer. Get ready for the first horrible photo...

    Fire-and-Ice-Creamy-Crab-and-Herb-Dipper


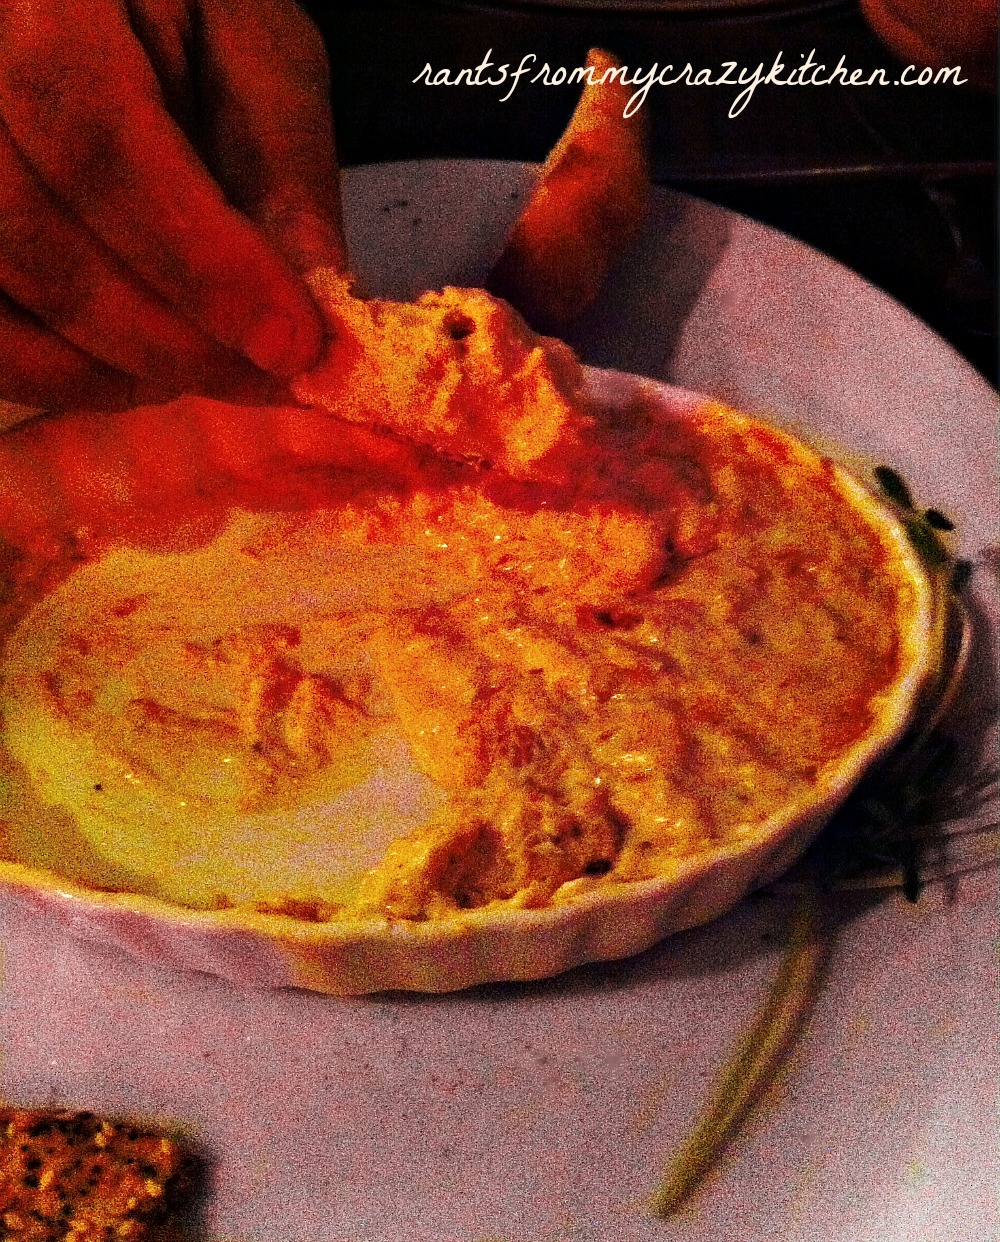
    We have ordered this before, and it is really good! Lump crab, in a creamy herb sauce served with Chesapeake seasoned flatbread, this appetizer is recommended for a least two people. Each time we order it, we devour it!

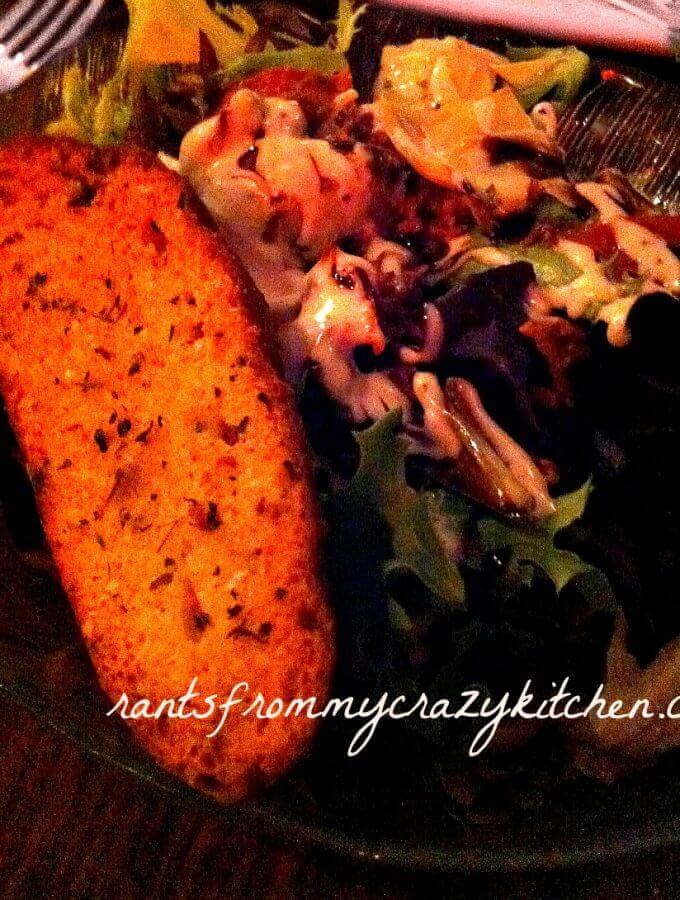
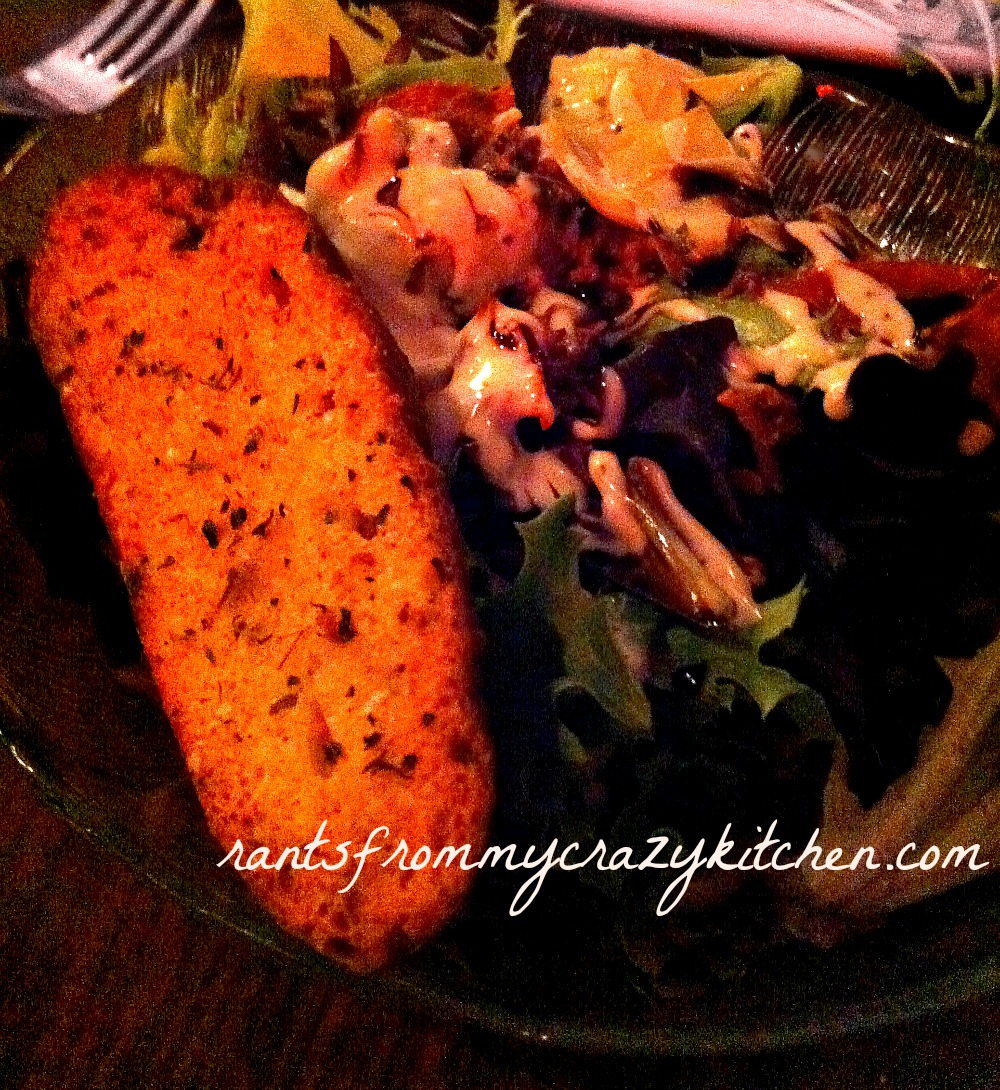
    For our entrees. my husband and I appeared to switch personalities. After hearing the specials I decided that the 12 ounce Cajun New York Strip with crab meat blue cheese glacage over Yukon gold mashed potatoes with caramelized leek, vidalia onion, and sundried tomatoes sounded too good to pass up.

    Fire-and-Ice-Cajun-NY-Strip-Steak


    I chose the Artichoke-Bacon-Roasted Tomato Salad as the accompaniment, paying a dollar extra, but worth it! Again, I've ordered this salad every time we have been there.

    Fire-and-Ice-Artichoke-Bacon-Roasted-Tomato-Salad


    My husband chose the swordfish special, which is what I mean about switching personalities. I'm normally the one to order seafood while he orders the steak, so of course we sampled a little of each others. I didn't get any pictures of my husband's entree.

    The service was excellent, regardless of how busy they were. I wish I could remember the waitresses name, but I have forgotten. She was very helpful in her description of the specials, had everything completely memorized even though it was a long list of specials, was quick with our drinks, and returned several times to ask if we needed anything.

    The next time we go I want to try the hearth baked pizza, or maybe the chicken pot pie, or the hearth baked lobster macaroni and cheese, or...you get the idea. They do have a children's menu, so next time we go I think our daughter will be coming.

    Fire and Ice on Urbanspoon

    Blueberries N Cream Roll Cake - Guest post from It's Yummi

    July 8, 2014

    Blueberries-n-Cream-Roll-Cake-from-ItsYummi

    Isn't that a gorgeous cake? I'm so happy my friend Becca brought a blueberry dish to share with you today! I've had a blueberry bush in my garden for a few years now and have yet to see one blueberry. Maybe next year. Before I hand you off to Becca for the Blueberries N Cream Roll Cake, I want to publicly say Happy Birthday to my daughter, Amanda, who turned 5 on Sunday! We had a cookout for her birthday party, along with swimming and a small fireworks display at the end.

    Here she is with her best friend, Jordyn, getting a chalk outline from my sister:

    Amanda-and-Jordyn-5th-Birthday


    I know she had a great day, and she was thrilled that Jordyn got to sleep over. They always have a great time together, in between the typical 5 year old fighting. They will get over it someday, I think.

    Today's guest post, like I mentioned, comes from my friend Becca. Becca has always been there for me, I've been following her blog for a few years now, and I'm so glad we got to know each other! She posts more healthy recipes than I do, and if you need some low-carb recipes she's your lady. That doesn't mean she can't make an awesome dessert, though. I'm sure you will agree!

    Blueberries-n-Cream-Roll-Cake-from-ItsYummi-2


    ​Hi, everyone! I'm so happy to be here with all of you today. I'm Chef Becca Heflin, from It's Yummi. I graduated from culinary school 3 years ago, but instead of slaving over a hot commercial kitchen in a restaurant, I chose to pursue my passion for turning ordinary ingredients into extraordinary dishes on a my food blog! I love sharing my cooking knowledge and recipes with my readers. It's a delightful job, and I feel blessed to have it! It was so nice of Bernadette to ask me to share a dessert recipe with you today, because it's my son's 22nd birthday. Happy 22nd birthday, TJ!

    Unfortunately, he lives far away and we don't see each other at all, so this blueberries n cream roll cake will have to suffice as his virtual celebration. Roll cakes look sort of intimidating, but truthfully, I find them to be much easier to make than traditional birthday cakes. See, I tend to drive myself a bit batty trying to slice a cake into perfect, even layers, because I have hand tremors. Now don't get me wrong... I can bake up a cake and it'll melt in your mouth because it's so moist, but it'll look like a 5 year-old made it! Want proof? Look at this delicious but disastrous chocolate layer cake (with the world's BEST frosting) that I made last year. It's awful looking! LOL

    I think it's much easier to make bundt cakes, like this pomegranate lime bundt cake, or rich and decadent cheesecakes like this whipped cream cheesecake, OR to put fluffy whipped cream on top of moist, tender sponge cake and roll that baby up into a beautiful, delicious dessert like this roll cake!

    Roll cakes are really versatile, too. You can add flavored extracts like lemon or orange to your basic cake batter to give it a different flavor, and the filling options are endless. Roll your cake up with fresh fruits, preserves, chopped nuts, candies, chocolates, or just plain and simple whipped cream goodness. It's completely up to your imagination and your taste buds.

    No matter how you make your roll cake, I hope you enjoy it to the fullest!

    How to make a blueberries n cream roll cake

    Blueberries n Cream Roll Cake

    Yield: 8-10 slices

    INGREDIENTS

    CAKE

    • 4 eggs
    • 1 teaspoon vanilla extract
    • ¾ cup sugar
    • ¾ cup sifted cake flour
    • 1 teaspoon baking powder
    • ¼ teaspoon salt
    • Confectioners' sugar

    CREAM FILLING

    • 1 cup heavy whipping cream
    • ¼ cup sugar
    • 1 cup blueberry preserves
    • Fresh blueberries (optional)
    • Additional whipped cream (optional)

    INSTRUCTIONS

    1. Heat oven to 375°.
    2. Grease a standard size jelly roll pan, then line with waxed paper and grease the paper. That will assure that none of your cake will stick to the waxed paper.
    3. In the bowl of a hand or stand mixer, beat eggs and vanilla on high speed for 5 minutes, or until lemon-colored. Turn speed to medium and gradually add sugar, beating until dissolved.
    4. In a medium bowl, combine flour, baking powder and salt. Fold gently into egg mixture just until combined. Pour batter into prepared jelly roll pan and use a spatula to spread it evenly across the pan.
    5. Bake for 10-12 minutes or until light brown and edges start to pull away from sides of pan. Turn hot cake out, waxed paper side up, onto a lint free, clean kitchen towel that has been well dusted with confectioners' sugar. Peel waxed paper away from cake, Starting on short side of cake, roll up cake tightly into the towel and allow to cool completely.

    FOR FILLING

    1. Place metal mixing bowl and whisk attachment (or beaters for a hand mixer) into the freezer for 10 minutes.
    2. Place heavy cream into chilled bowl and whip on high speed until soft peaks have been formed. With mixer still running on high speed, lightly sprinkle sugar into cream and continue mixing on high for 2 minutes, or until light and fluffy.

    ASSEMBLY

    1. Unroll cake from towel and use a spatula to spread whipped cream evenly over the cake. Use an offset spatula or knife to apply jam in an even layer on top of whipped cream. Roll up the cake again and refrigerate for 2 hours before serving. Sprinkle with confectioners' sugar and garnish with blueberries and additional whipped cream, if desired.

    Recipe adapted from Taste of Home​

    Nuvino Wine Review and 4th of July Recipes

    July 3, 2014

    Disclamer: Miravante Brands, LLC provided me with product for this review. All opinions are my own and those who sampled the wine with me. 

    Nuvino-Wine


    Happy 4th of July to all my US readers! I don't have a new recipe for you today, but if you are looking for recipes for your holiday cookout my Broccoli Cheddar Pasta Salad is always a hit, served with Blue Cheese and Onion Stuffed Sliders, and might I suggest Patriotic Chocolate Chip Cookie Ice Cream Sandwiches for dessert?

    Today I want to tell you about a new line of wine I recently had the chance to sample.  Nuvino is a new line of wine that is unique, look at that, it comes in portable pouches! For this review I was given the samples pictured above, and I gave the Sauvignon Blanc to my friend to try, the Malbec to my neighbor, and I tried the Red Blend, leaving my husband to sample the Chardonnay.

    I love the portability of the wine, it would be great to stick in coolers for outdoor parties, coming in single serving size (187 ml) pouches that won't break open, open easily, and are resealable. The pouches are called PreservPak and are designed to be highly-durable with a minimum self life of one year.  You don't even need a glass, you can drink right from the spout!  This initial line includes wine from Australia (Red Blend), Chile (Sauvignon Blanc), South Africa (Chardonnay), and Argentina (Malbec). The 4-pack retails for $14.99, or individually for $3.99. The brand is initially available in 16 states, and expected to be nationwide by the end of 2014. Nuvino is also available online at Liquorama

    I have to be completely honest here. I'm not really a wine snob. I do drink it occasionally, but I'm not the type that insists on the perfect wine pairing. I prefer red wine, to be more specific red dessert wines and don't really care that white wine is supposed to go with poultry. For that matter, I generally prefer the less expensive wines over the more expensive. So, reviewing a wine itself is a bit hard for me. The Sauvignon Blanc I gave to my friend ended up being sampled by another friend. It is described as having "fresh aromas of white flowers and crisp citrus notes combined with green apples and white peaches". My sampler said it was crisp and dry with a hint of apples. The Malbec my neighbor sampled was described as a bit bitter, but he's not really a wine drinker. I could really taste the plums and mulberries in the Red Blend, but I would prefer something a bit lighter. My husband hasn't tried his yet, but I'm sure he will this weekend. I would love it if they added a blush to their collection.

    To sum it up, I would purchase these packs for a summer outdoor party where there would be wine drinkers. I find the serving-size convenient, I was able to easily fit the 4 packs in my fridge while it would be hard to fit 4 full-size bottles of wine. I hope they can expand there offerings after this initial start.

    Patriotic Chocolate Chip Cookie Ice Cream Sandwiches -Guest Post From Frosting and A Smile

    July 1, 2014

    Chocolate Chip Cookie Ice Cream Sandwiches


    This week has been crazier than my usual level of crazy. I can't even begin to tell you how grateful I am for my guest poster today, Laurie, and these Patriotic Chocolate Chip Cookie Ice Cream Sandwiches. If you want to read about my crazy week, and why I'm now weeks behind on new recipes and reviews, you can read on. If you don't, you can skip right to the recipe, I don't blame you one bit!

    If you've been following me for a while, you know I'm very close to my daughter's Godmother, Chelsea. She's the daughter of two of my friend's, and the niece of another, and many moons ago I lived with her and took care of her and her sister while her mother was in college and working. Her first baby, a boy named Ayden, was born on Wednesday after two days of labor. Even though I wasn't going to be in the room when the baby was born, I wanted to be at the hospital, so I got the first phone call that she was going to the hospital last Tuesday at 3:30 in the morning. I never made it there before she was sent home, but I was wide awake from the phone call until midnight that night. She continued to have contractions, so I knew it would be soon, but by late Tuesday night I thought maybe not until the next day. I clearly remember writing a status on my personal Facebook at midnight that said "Okay, I'm going to bed now, nobody have a baby for the next two hours!" I should have know better, the phone rang at 12:53 AM! Thirteen hours later, Ayden finally made his appearance!


    Chelsea-and-Ayden-Newborn


    In the days following, I recovered from not sleeping for two days, put a ton of laundry away, spent time with my daughter and my sister, did garden work, and then our central air broke so I haven't been cooking.  I'm coming back this week, though, so I will have more for you soon! For now I'll hand you over to Laurie for this delicious dessert.

    Hello everyone! I'm so happy to be hanging out with you here at Rants From My Crazy Kitchen. I'm visiting from Frosting and a Smile. This is the first guest post I have ever written. I hope I can do Bernadette and her site justice. From the first month I started blogging, Bernadette welcomed me like an old friend. She is so kind and generous with her time that there was no way I could say no when she asked me to write here.
    I brought the instructions for Chocolate Chip Cookie Ice Cream Sandwiches with me. We can whip up a batch while we chat.
    We start with a soft and chewy chocolate chip cookie. It's slightly adapted from the All Recipes Big, Fat, Chewy Chocolate Chip Cookie. There's nothing as tasty as this from-scratch version but If you only slept three hours last night because the kids kept you up (I've totally been there) or it's just too darn hot to turn on the oven (been there too), you can use store-bought cookies.
    DSCN4544a

    To start, sift together your dry ingredients.
    DSCN4546a

    Beat melted butter with brown sugar and white sugar. I'll let you in on a kitchen secret; Melted butter is the key to perfectly chewy chocolate chip cookies.
    DSCN4550a
    Add an egg, egg yolk, vanilla extract, and almond extract. The almond flavor doesn't come across too strong. It just adds a little extra something special that makes people ask "what is that?" You can just tell them it's your little secret.
    DSCN4554a

    Gradually beat in the flour mixture.
    DSCN4578a

    Stir in chocolate chips and sprinkles.
    DSCN4559a

    Scoop the dough into tablespoon-sized balls. Dunk the top of each ball into sprinkles.
    DSCN4581a

    Bake until golden brown.
    DSCN4583a

    Once your cookies cool, turn half of them over and top them with a scoop of vanilla ice cream. You can use any flavor ice cream (or even frozen yogurt) you would like.
    DSCN4584a

    Top each scoop of ice cream with another cookie, then roll the edges in sprinkles. Can you tell I have an absolute fascination with sprinkles? Confession; I've been known to order my ice cream sundaes with a double shot of sprinkles. Really, I don't even need the ice cream. Just give me a big bowl of sprinkles swimming in whipped cream and I'm all set.
    DSCN4623a

    These red, white, and blue sprinkles are great for Fourth of July or Memorial Day. You can change it up with any colors you like. Try mixing it up to match a holiday or party theme.
    DSCN4596a

    Thank you for spending some time with me. I hope Bernadette will invite me for another visit. Until then, stop on over to visit me any time. Have a sweet day!
    About the Author: Laurie helps you satisfy your sweet tooth on her blog Frosting And A Smile . She develops fun-to-share dessert recipes and breaks them down into simple steps so anyone can make them. Laurie is also a Parade.com contributor and three-time Emmy-nominated journalist. She is married and has a three-year-old son. You can follow her on Pinterest, Facebook or Google +.

    (Baking with Kids) Easy Chocolate Cake -Guest Post from Baking Outside The Box

    June 24, 2014

    IF my daughter's Godmother's baby comes today (due two days ago and just got sent home from the hospital because her contractions weren't progressing), Christa from Baking Outside The Box has brought the perfect recipe to share today, a chocolate cake! My birthday cake every year growing up was chocolate, and in a few years I will be able to teach the kids how to make this cake! I couldn't ask for more. Plus, it looks delicious!  I've included the printable version at the end, with the prep time including the cooling time before frosting.

    Easy-Chocolate-Cake

    Hi, this is Christa from Baking Outside the Box, a blog all about making scratch
    baking easier for the home cook. Today I want to share with you a great
    recipe I use for teaching my kids about baking.

    This chocolate cake is the easiest cake I've ever made, so it is perfect for baking with kids, since they can do most of the steps themselves. It rivals a box mix for speed and simplicity, but it really tastes great.


    1 ½ cups all-purpose flour

    3 Tablespoons cocoa powder

    1 cup Sugar

    1 teaspoon baking soda

    1 teaspoon salt

    6 Tablespoons vegetable oil

    1 Tablespoon white vinegar

    1 teaspoon vanilla extract

    1 cup cold water


    Preheat Oven to 350 degrees.


    Grease an 8" square casserole dish (for a round cake you can use one 9" cake pan).


    Sift the dry ingredients together and stir with a fork until well-mixed. Make three wells in the dry ingredients. Pour the oil into the first well, the vinegar into the second, and the vanilla into the third. Pour the cold water over the top of it all, then stir with a fork until well-blended. Pour into greased pan and bake at 350 for about 25 minutes, until a toothpick inserted in the center comes out clean. Let it cool, then frost.


    Frosting:

    4 Tablespoons Butter

    2 Tablespoons cocoa powder

    1 ½ Cups Powdered Sugar

    dash of salt

    2 Tablespoons milk


    Cream together the butter, sugar, cocoa and salt until well-mixed. Add the liquid and beat until fluffy. You can do this by hand since it is such a small batch, you really don't need to use a stand mixer for this.


    Have some sprinkles handy for the kids to decorate it!

    Print Recipe
    4.25 from 16 votes

    (Baking with Kids) Easy Chocolate Cake -Guest Post from Baking Outside The Box

    Easy homemade chocolate cake, great for baking with kids!
    Prep Time1 hour hr
    Cook Time25 minutes mins
    Total Time1 hour hr 25 minutes mins
    Course: Dessert
    Servings: 8
    Calories: 421kcal
    Author: Christa- Baking Outside The Box

    Ingredients

    • 1 ½ cups all-purpose flour
    • 3 Tablespoons cocoa powder
    • 1 cup Sugar
    • 1 teaspoon baking soda
    • 1 teaspoon salt
    • 6 Tablespoons vegetable oil
    • 1 Tablespoon white vinegar
    • 1 teaspoon vanilla extract
    • 1 cup cold water
    • Frosting:
    • 4 Tablespoons Butter
    • 2 Tablespoons cocoa powder
    • 1 ½ Cups Powdered Sugar
    • dash of salt
    • 2 Tablespoons milk

    Instructions

    • Preheat Oven to 350 degrees.
    • Grease an 8" square casserole dish (for a round cake you can use one 9" cake pan).
    • Sift the dry ingredients together and stir with a fork until well-mixed. Make three wells in the dry ingredients. Pour the oil into the first well, the vinegar into the second, and the vanilla into the third. Pour the cold water over the top of it all, then stir with a fork until well-blended. Pour into greased pan and bake at 350 for about 25 minutes, until a toothpick inserted in the center comes out clean. Let it cool, then frost.
    • For the frosting:
    • Cream together the butter, sugar, cocoa and salt until well-mixed. Add the liquid and beat until fluffy.

    Nutrition

    Calories: 421kcal | Carbohydrates: 67g | Protein: 3g | Fat: 16g | Saturated Fat: 12g | Cholesterol: 15mg | Sodium: 482mg | Potassium: 77mg | Fiber: 1g | Sugar: 47g | Vitamin A: 175IU | Calcium: 13mg | Iron: 1.5mg


    Cheesy Bacon Microwave Fajitas and National Recipe Contest

    June 23, 2014

    Cheesy-Bacon-Microwave-Fajitas

    You could win $5000 and be featured at the New York City  Food Network Wine & Food Festival 

    esa-recipe-contest-badge-350x300

    Have you ever been traveling, staying in a hotel, and yet can't afford to eat at a restaurant every single night? Have you ever stayed in a hotel that had kitchens right in the rooms? Extended Stay America has them, and even better, they are searching the nation for travel-friendly recipe in a recipe contest! These Cheesy Bacon Microwave Fajitas are quick ( around 20 minutes total to make), easy, delicious, and my entry in the contest. You can enter too, they aren't just looking for professional cooks or recipe developers, but regular home cooks, just like me and you!

    Away From Home Cooking is a recipe resource put together by Extended Stay America, and they are looking to add to it with YOUR recipe. Wait, it get's better! Four finalists will win a trip to New York City to compete in a cooking challenge, with Food Network star Sunny Anderson and the grand prize winner will receive $5000 and a trip to the Food Network Wine & Food Festival and be featured along with Sunny! Ideal recipe submissions should be easy, able to be made in an Extended Stay America kitchen, which come equipped with a stove, refrigerator, and microwave (no oven, so no baking), and 10 ingredients or less. For complete contest details visit Contest.AwayFromHomeCooking.com. Contest updates are also posted on Extended Stay America's social media channels including Facbook.com/ExtendedStayAmeric and  Twitter.com/ExtendedStay.  Voting doesn't begin for a while yet, so I'll let you know when it does. 

    These fajitas only require a few plates to cook the bacon and onions and peppers in the microwave. Only the cilantro requires chopping, but you could use dried instead of fresh, just make sure to cut the amount to 1 teaspoon. Then you simply pile on the ingredients,fold the bottom over,

    Folding-Cheesy-Bacon-Fajitas


    and roll.

    Rolling-Cheesy-Bacon-Fajitas


    Place seam side down on a microwave safe plate,

    Folded-Cheesy-Bacon-Fajita


    Cook on high for 1 minute (for two fajitas), then turn and cook for 30 seconds more. Top with sour cream or guacamole, and you have a great dinner ready in 20 minutes or less!


    Cheesy-Bacon-Microwave-Fajitas-2

    Print Recipe
    No ratings yet

    Cheesy Bacon Microwave Fajitas and National Recipe Contest

    Quick and easy fajitas cooked entirely in the microwave.
    Prep Time5 minutes mins
    Cook Time15 minutes mins
    Total Time20 minutes mins
    Course: Entree
    Servings: 4
    Calories: 511kcal
    Author: Bernadette

    Ingredients

    • 8 slices bacon
    • 4 fajita style tortillas
    • 2 cups shredded Mexican cheese blend
    • ½ cup frozen diced onions
    • ½ cup frozen diced peppers
    • 4 pickled jalapeno slices diced fine
    • 2 teaspoons chopped fresh cilantro
    • 1 tablespoon butter
    • splash lime juice

    Instructions

    • Place the bacon, not overlapping, on a paper towel lined microwave safe plate and cover with two additional paper towels. Microwave on high for 6 mins, then transfer to another plate covered with paper towels and microwave, uncovered, for 1 minute more.
    • While the bacon is cooking, place the frozen pepper and onion on a plate in a single layer to defrost slightly. Drizzle with melted butter, add the chopped cilantro and jalapenos, splash with lime juice, and stir. Microwave on high, uncovered, for 4 minutes, stopping and stirring once every minute. Evenly divide the mixture into 4 parts.
    • Microwave tortillas , wrapped in a damp paper towel, for 20 seconds. Place two strips of bacon in the middle of each tortilla, top with onion/pepper mixture, and ⅓ cup shredded Mexican cheese.
    • Roll tortillas by folding the bottom up and then over length-wise. Place two fajitas on a microwave safe plate, seam-side down. Microwave on high for 1 minute, turn, and microwave for 30 seconds more. Top with sour cream or guacamole.

    Nutrition

    Calories: 511kcal | Carbohydrates: 19g | Protein: 21g | Fat: 38g | Saturated Fat: 17g | Cholesterol: 89mg | Sodium: 929mg | Potassium: 242mg | Fiber: 1g | Sugar: 3g | Vitamin A: 560IU | Vitamin C: 16.4mg | Calcium: 405mg | Iron: 1.6mg


    This recipe is featured on Hun, What's For Dinner Simple Supper Tuesday #68

    Minestrone Soup- Guest Post from Read At Home Mama

    June 17, 2014

    Welcome to another Summer guest post! This time my friend Erin from Read-at-Home Mama has graciously offered to be my victim...err I mean wonderful contributor! She's not a food blogger, although she is a great cook, she writes reviews of all kinds of books. We met in an online forum for brides back in 2006, and have been friends since, even though we have yet to meet in person! She has brought us minestrone soup, which even though it's hot out here, is perfect because many of the veggies in the soup are readily available at farmer's markets now. I can't wait until our local farmer's markets start! Unfortunately around here I have to wait until the end of June 🙁 On a good note, we plant a fairly large garden every year, so I don't even always make it to the farmers market. Nothing is better than fresh from the farm or your own garden! Are you ready for Erin? Here she is!

    Minestrone-Soup


    Hi, I'm Erin. I'm a stay-at-home mama to a toddler and a furbaby. Books, dancing, and sweets are my greatest weaknesses. I can talk as easily about Daniel Tiger as I can about Scandal. My heart resides in the library, my soul can be found in the kitchen, and my spirit is always stretching at the barre...but my happiness lives in my 2-year-old. Thank you for joining me on this wild ride!

    Summer is finally upon us! I know you saw the title and thought, "Soup?! Really? But it's too warm out for soup!" Yeah, I know, it's getting warmer outside...but farm markets are opening everywhere right now and there is literally no better time to get the freshest vegetables possible! I make this soup year-round and, in the colder months, I have to pick up veggies as they're available in my grocery store. But who knows where they came from, how long and far they traveled between the farm and the store, and how fresh they really are! Now that you can get just about every vegetable you want from the farm stand, you're guaranteed that they're at their freshest and besides, who doesn't love filling a bowl with every color under the delicious rainbow, right?

    I'm a big fan of soup, as is my two-year-old. Now, I could go simple and just crack open a can of Campbell’s chicken noodle soup…or I could go for the Progresso tomato basil soup and throw together a few grilled cheese sandwiches. But I really want to go as healthy and fresh as possible, and there's really no better way to do that than to make a soup from scratch. Minestrone is one of the most veggie-loaded (and therefore nutritious) soups out there, so I'm going to share my recipe with you today!

    Full disclosure, though: I’ve never been a fan of real tomatoes. I’m weird that way: I’ll eat them as soup, or as a sauce on pasta or pizza, or as ketchup on a burger or with fries with no problem. But I’ve always hated the texture of the actual tomato. Offer me some cherry tomatoes for my salad or slices of an heirloom tomato to garnish my sandwich and I’ll politely decline. There’s really no rhyme or reason behind it; I just don’t like it. So when I decided I wanted to make my own minestrone, I naturally decided to omit the red stuff. (My advance apologies to all the tomato fans out there...and feel free to add them if you like them!)

    The minestrone I love to make, however, is still delicious with or without tomatoes! When Joshua was a baby, he used to vacuum this soup down like he couldn’t get enough of it; now, as a picky two-year-old, he’ll still eat it but only if I’m eating it, too. The Hubby refuses to eat it solely because there’s no meat in it. I suppose I could add chicken to it — maybe I’ll try that next time and see if it's enough to convince him.

    For now, though, we’re sticking to vegetables!

    So here’s what you’ll need to make my tomato-free minestrone:

    Minestrone-Soup-Ingredients

    Read-at-Home Mama's Minestrone Soup

    • 3 tablespoons olive oil
    • 1 small minced white onion
    • 2 diced potatoes (if you only have small potatoes, use 3)
    • 2 cups chopped zucchini
    • 2 cups frozen cut Italian green beans
    • 4 cloves minced or grated garlic (I prefer to grate it)
    • 4-6 cups vegetable broth (depending on how “brothy” you like your soup; I usually go between 5-6 cups)
    • 1 can (15 oz) red kidney beans, drained (light or dark, your choice)
    • 1 can (15 oz) great northern or cannellini beans, drained
    • ½ cup shredded carrot
    • 2 tablespoons minced parsley
    • 1 ½ teaspoons dried oregano
    • ½ teaspoon salt
    • ½ teaspoon ground black pepper
    • ½ teaspoon dried basil
    • ¼ teaspoon dried thyme
    • 3 cups hot water
    • 4 cups fresh baby spinach
    • 1 ½ cups small shell or other small shape pasta

    Before you light your burner, cut up and organize all of your ingredients! It makes the cooking process much quicker and easier. Because the vegetables go into the pot in a particular order, I like to “chop and drop” groups of them into separate bowls. The onion, garlic, zucchini, and green beans all go into one bowl; I rinse the red and white beans separately and then combine them in another bowl; the carrots and potatoes get a bowl of their own; and I measure all of the spices into one more separate small bowl. So before I start cooking, my countertop usually looks something like this:

    Minestrone-Vegetables


    Okay! Now that your ingredients are all set out and organized, you’re ready to get started! First, you need to warm 3 tablespoons of olive oil over medium heat.

    Oil-For-Minestrone


    Things are going to start smelling yummy in your kitchen very quickly from this point on! Now, I’ve learned from watching the Food Network that if you dip a wooden spoon or the wooden handle of another utensil into the oil, you can tell that the oil is sufficiently heated by looking for bubbles to form around the wood. Go ahead and try that! If you don’t have a wooden spoon, that’s okay; you can typically tell if your oil is warm simply by holding your hand over it.

    Now that your oil is ready to go, add the onion, garlic, green beans, and zucchini into the pot and saute them for about 5 minutes, or until the onions become see-through. When they go in, they’ll look something like this:

    Adding-Veggies-to-Minestrone


    And when they’re ready for their veggie friends to join them, they’ll look like this:

    Cooked-Zuccini-Blend


    You’re doing great so far! Go ahead and lean over your pot, and take a sniff. I don’t know about you, but I could eat these veggies as they are now! We’ll all have to wait though — there’s more deliciousness on the way! Now you’re ready for the hot tub party, so to speak. Add your vegetable broth…

    Adding-Broth-to-Minestrone


    …and beans…

    Beans-for-Minestrone


    …carrots and potatoes…

    Potatoes-and-Carrots-Minestrone


    …and hot water and spices to the pot.

    Spices-for-Minestrone


    Tell me this doesn't look amazing already!!

    Minestrone-Simmering


    Now you can relax for a little while! Give it a stir, bring it up to a boil and then reduce it to a simmer for 20 minutes, and let the magic happen.

    By the way, two quick notes:
    1. You may or may not do this, but I have been known to “check” my vegetables from time to time during the 20-minute wait. Yeah, I’m that person who leaves a folded paper towel and a fork next to the burner so I can fish out one of each kind of vegetable with my spoon, lay them on the towel to cool, and then eat them with the fork. Yup, that’s me. Am I ashamed? Not even a little bit. :)
    2. You probably noticed that the pot in the photos above magically changed color! I promise I did all of this in one day and one cooking session. I was so excited about making the soup that I started cooking in the wrong pot — the pot in the first several pictures would have literally overflowed had I continued with the recipe. I switched over to the larger pot that I was supposed to be using; crisis averted!

    Ding-ding! Twenty minutes is up!

    Simmered-Minestrone


    Now what?

    Toss in your spinach leaves and use your cooking spoon to “sink” them into the liquid and help them wilt, like this:


    Adding-Spinach-to-Minestrone


    And then pour in your pasta as well. (By the way, today I used whole-wheat elbow noodles to bump up the health factor and honestly, as someone who normally eats regular “white” semolina pasta, I couldn’t tell the difference — and more importantly, neither could Joshua! Score!)

    Adding-Pasta-to-Minestrone


    Now you get another break! Let everything simmer in the pot for another twenty minutes, stirring occasionally.

    While you’re waiting, you could paint your nails, or pick up that magazine you've been meaning to read, or fold a load of laundry, or play with your kids for a few minutes (if you have any)…

    What? Twenty minutes is up? Already?! Yay! Let’s go check out the finished product…

    Finished-Minestrone


    Yeah, I’m grabbing a big bowl for this one. You want some??

    I like to sprinkle a little shredded mozzarella or parmesan, or a few garlic croutons on my soup, and keeping some crusty bread handy to mop up the broth is always a great idea. How do you top yours? Try it out and let me know what you think!!

    You can find Erin here:

    Facebook: http://www.facebook.com/ReadatHomeMama

    Twitter: http://twitter.com/readathomemama

    Instagram: http://instagram.com/readathomemama#

    Pinterest: http://pinterest.com/rinaferc

    Polish Coal Miner Piggies (Stuffed Cabbage Rolls- Golabki) #SundaySupper

    June 15, 2014

    Photo of a plate of two stuffed cabbage rolls with sauce on a flower trimmed white plate next to a glass of beer sitting on a wood table

    Stuffed Cabbage Rolls, also called piggies or Golabki, are made with a beef and pork filling wrapped in cabbage leaves and topped with bacon in a sweet tomato sauce. Man Food, post written and recipe by my husband!

    Piggies-Stuffed-Cabbage-Rolls

    Today's #SundaySupper topic is fitting for Father's Day, Man Food! I asked my husband what I should post, and what does he say? Not steak, not brats, not bacon. Nope, piggies, you know Stuffed Cabbage Rolls. Huh? "That's not man food!" I tell him, but he's dead set on it. Okay, fine, I tell him, "Then you can make them and write the post." He also took all of the photos except one.

    I have broken my own rule with this post, that I would never post anything I don't truly like to eat myself. I don't like cabbage, and I think the sauce he makes for these is too sweet (but you'll have to be the judge, he just says that's a difference in taste). Whenever he makes them, he makes me what he calls porcupine meatballs instead. I will eat those, so I guess it's more I just can't get over all that cabbage than I don't like them.

    I'll turn you over to my husband now, for his very first guest post for me, but before I go, don't forget to check out all of the other recipes that were shared today, listed below, and grab the printable version of the recipe for stuffed cabbage I have placed at the bottom of the post. Happy Father's Day to all the dads, grandpas, step-dads, and soon-to-be dads!

    *************************************************************************************************************

    In Northeast PA, as the offspring of “coal crackers”, we normally call these cabbage rolls “piggies”.  Although, they are know by many names (golabki, golumpki, holubki, pigs in a blanket). There aren't many guys I know that don’t enjoy them.

    Polish lore has it that the strength derived from this hearty Polish golabki recipe helped King Casimir IV Jagiello’s (Grand Duke of Lithuania and King of Poland) army defeat the Teutonic Order in a key battle of the Thirteen Years' War.

    As my heritage includes both Polish and Lithuanian (and some German from my Father’s side), these were always a meal I remember my Grandmother (on my Mother’s side) making and as a child, I was allowed to mix the meat.

    As for the “Coal Miner” part of the recipe name, my Grandfather was a coal miner in Ashley, PA and died from black lung before my parents were even married, my Grandmother passed when I was twelve.  Later in life, when I asked my Mother about the recipe for these, I was given the “some of this and some of that”shpiel without any real measurements.  Her and my Grandmother did a lot of their cooking by taste and feel.  So this recipe is inspired by my Grandmother’s piggies and has passed my Mother’s taste test.

    These are definitely a Sunday (or Saturday) meal as there is a fair amount of prep work involved (1 to 2 hours - depending how fast you are) but, to me it is worth it.


    Piggie-Ingredients


    Polish Coal Miner Piggies (Stuffed Cabbage Rolls- Golabki)

    You’ll need;

    1 head of cabbage (you’ll boil off 12 to 15 leaves - based upon the size of the head)

    1 ¾ lbs of ground beef

    ¾ lbs of ground pork

    1 tsp salt

    1 tsp pepper

    1 tsp garlic powder

    2 eggs

    1 cup minute rice (uncooked)

    2 large green peppers

    2 large onions (3 if they are smaller)

    3 stalks of celery

    2 16 oz cans of diced petite tomatoes

    32 oz tomato juice

    ½ cup sugar

    ¾ cup maple syrup

    6 to 7 slices of bacon (depending upon how many piggies you end up with)


    Remove the core (stem) from the head of cabbage with a long thin knife.

    Boil head until a leaf separates from the head and remove from the pot with tongs.

    Boiled-Cabbage

    Remove the thick stem from the back of leaf by cutting around it in a “V” shape, this will make it easier to roll the leaf around the meat.

    Cabbage-Leaf


    Repeat this process until you have 12 to 15 leaves.

    Shred remaining cabbage, this will be used later.

    In a mixing bowl, add the salt, pepper, garlic powder, eggs, and uncooked rice and mix.

    Mince the green peppers, onions and celery and mix together.

    Add about ½ to ¾ of the vegetable mixture to the meat mixture, add the rest to the shredded cabbage.

    Open the cans of diced tomatoes, place in a mixing bowl and mix in sugar.

    Prepare the pan by making a bed of the the cabbage/vegetable mixture.

    Here is the tricky part, making the stuffed cabbage rolls. It will take a little bit of “feel”, the rolls should be about the size of a fist or just smaller (depending upon the size of your fist and the size of the leaf).

    Make an elongated meatball and wrap in a cabbage leaf (place the meat at the bottom of the leaf, overlapping the slice that was made to remove the thick stem and roll about halfway (one turn), then tuck the edges of the leaf in and continue to tip of leaf). It is kind of like rolling a burrito but I think rolling the cabbage is easier -I tend to rip tortillas.


    Rolling-Piggies


    Place the roll place in the pan. Repeat for all leaves (remember measuring how much meat is in each leaf is based upon the size of the leaf - each one is an individual).


    Rolled-Piggies


    For those that aren't huge fans of cabbage, or if you run out of leaves, you can make a “naked piggies”.  Just make big meatballs and place them in the pan, my Mom calls these “porcupines”.  Another derivation would be stuffing the mix in green peppers.  You can mix and match however you like…

    Pour diced tomato mixture over the piggies.

    Add tomato juice to fill pans to just over halfway.

    Place bacon strips over piggies (one slice should cover two) and drizzle the maple syrup over the bacon.

    Cover pans with tin foil.

    Place in oven at 350 degrees for 45 minutes.

    Remove tin foil and cook for additional 15 minutes to brown bacon.

    Cooked-Piggies

    Plate and drizzle some of the juice and shredded cabbage over them.  These are usually served with bread (to mop up the juice) and mashed potatoes (also with some of the juice added over them - like gravy).  Smacznego!!! Skanaus!!!! I think this is truly the best cabbage roll recipe!

    Here are some more recipes with cabbage to try:

    Bacon Blue Cheese Cole Slaw

    Halushki with Bacon and Ricotta Cheese 

    Sriracha Slaw- Guest Post From It's A Keeper

    WANT EVEN MORE DELICIOUS RECIPES FROM MYSELF AND MY FAVORITE FOOD BLOGGERS? FOLLOW ME ON PINTEREST, TWITTER, INSTAGRAM, OR FACEBOOK, WHERE I SHARE NEW RECIPES DAILY. YOU CAN ALSO SUBSCRIBE BY EMAIL TO GET NEWLY POSTED RECIPES FOR FREE!

    Read on after the Stuffed Cabbage Rolls recipe to see all the other Man Food recipes shared today.

    Photo of a plate of two stuffed cabbage rolls with sauce on a flower trimmed white plate next to a glass of beer sitting on a wood table
    Print Recipe
    4.70 from 10 votes

    Polish Coal Miner Piggies (Stuffed Cabbage Rolls- Golabki) #SundaySupper

    Stuffed Cabbage Rolls, also called piggies or Golabki, are made with a beef and pork stuffing in a sweet tomato sauce. 
    Prep Time1 hour hr
    Cook Time1 hour hr
    Total Time2 hours hrs
    Course: Entree
    Cuisine: Polish/American
    Keyword: pigs in a blanket cabbage, Polish Cabbage rolls, polish stuffed cabbage
    Servings: 6
    Calories: 968kcal
    Author: Bernadette

    Ingredients

    • 1 head cabbage
    • 1 ¾ lbs ground beef
    • ¾ lbs ground pork
    • 1 tsp salt
    • 1 tsp pepper
    • 1 tsp garlic powder
    • 2 eggs
    • 1 cup minute rice uncooked
    • 2 large green peppers
    • 2 large onions 3 if they are smaller
    • 3 stalks of celery
    • 2 16 oz cans of diced petite tomatoes
    • 32 oz tomato juice
    • ½ cup sugar
    • ¾ cup maple syrup
    • 6 to 7 slices of bacon

    Instructions

    • Remove the core (stem) from the head of cabbage with a long thin knife.Boil head until a leaf separates from the head and remove from the pot with tongs.
    • Remove the thick stem from the back of leaf by cutting around it in a “V” shape, repeat this process until you have 12 to 15 leaves.Shred remaining cabbage.
    • In a mixing bowl, add the salt, pepper, garlic powder, eggs, and uncooked rice and mix. Mince the green peppers, onions and celery and mix together. Add about ½ to ¾ of the vegetable mixture to the meat mixture, add the rest to the shredded cabbage. Pour the diced tomatoes into a bowl and stir in sugar. .
    • Prepare the pan by making a bed of the the cabbage/vegetable mixture.
    • Make an elongated meatball and wrap in a cabbage leaf (place the meat at the bottom of the leaf, overlapping the slice that was made to remove the thick stem and roll about halfway (one turn), then tuck the edges of the leaf in and continue to tip of leaf. Place the roll place in the pan. Repeat for all leaves (remember measuring how much meat is in each leaf is based upon the size of the leaf - each one is an individual).
    • Pour diced tomato mixture over the piggies.Add tomato juice to fill pans to just over halfway.
    • Place bacon strips over piggies (one slice should cover two) and drizzle the maple syrup over the bacon. Cover pans with tin foil.
    • Place in oven at 350 degrees for 45 minutes. Remove tin foil and cook for additional 15 minutes to brown bacon.
    • Plate and drizzle some of the juice and shredded cabbage over them. These are usually served with bread (to mop up the juice) and mashed potatoes (also with some of the juice added over them - like gravy).

    Nutrition

    Calories: 968kcal | Carbohydrates: 85g | Protein: 44g | Fat: 50g | Saturated Fat: 18g | Cholesterol: 206mg | Sodium: 878mg | Potassium: 1761mg | Fiber: 8g | Sugar: 58g | Vitamin A: 1390IU | Vitamin C: 139.6mg | Calcium: 217mg | Iron: 7.2mg

    Stuffed Cabbage Rolls in a sweet tomato sauce with a beef and pork stuffing. Man Food!

    Manly Starters:

    • BBQ Chicken Nacho by Country Girl in The Kitchen
    • Beer Battered Fried Mushrooms by Kudos Kitchen by Renee
    • Burrata Bresaola and Arugula Appetizer by Family Foodie
    • Chicken Satay with Spicy Peanut Sauce by Hip Foodie Mom
    • Chipotle Pork Belly-Stuffed Jalapeño Poppers by The Redhead Baker
    • Coconut Beer-Battered Prawns with Spicy Marmalade by The Wimpy Vegetarian
    • Devils on Horseback by Nosh My Way
    • Fried Pickles by Cookin’ Mimi
    • Garlic and Herb Wine Jelly by What Smells So Good?
    • Maple Sriracha Chicken Wings by Manu’s Menu
    • Tomato Bacon Jam by Feed Me, Seymour

    Manly Mains:

    • Bacon Bourbon BBQ Burgers by The Girl In The Little Red Kitchen
    • Bacon Cheeseburger Crustless Quiche by Cupcakes & Kale Chips
    • Beef Barbacoa by Casa de Crews
    • Beef Short Rib Sandwich by Life Tastes Good
    • Beer Brats with Pepper Relish by Jelly Toast
    • Beer Can Chicken by Curious Cuisiniere
    • Chili Dog Casserole by Simple Gourmet
    • Chipotle Pork Chops by girlichef
    • Coconut & Lime Grilled Shrimp Skewers by Take A Bite Out of Boca
    • Colossal Burger by Jane’s Adventures in Dinner
    • Grilled Chipotle Chicken Pizza by Peaceful Cooking
    • Grilled Lobster with Miso Butter by Kimchi MOM
    • Grilled Sweet Guava Chicken by The Foodie Army Wife
    • Ham and Pineapple Pizza Pockets by gotta get baked
    • Huevos Rancheros Casserole by Pescetarian Journal
    • Lacquered Short Ribs in the Slow Cooker by Shockingly Delicious
    • Maple Chipotle Barbecue Pork Tenderloin by Flavor Mosaic
    • Meatball Burger on Garlic Bread by Healthy.Delicious.
    • Mom’s Slow Roasted Brisket by Food Lust People Love
    • Perfectly Pan Seared Steak by Serena Bakes Simply From Scratch
    • Pollo al Peperoncino by Run DMT
    • Red Chile Shredded Chicken Tacos. How to win over your man’s stomach and steal his heart. by Simply Healthy Family
    • Ropa Vieja by Meal Diva
    • Salt of the Earth Ribs by Culinary Adventures with Camilla
    • Salisbury Steak w/ Loaded Mashed Potatoes and Mushroom Gravy by A Kitchen Hoor’s Adventures
    • Smoked Turkey Drumsticks by Cindy’s Recipes and Writing
    • Stuffed Chipotle Bacon Cheese Burgers by Peanut Butter and Peppers
    • Tex-Mex Gut Buster Chili by Bobbi’s Kozy Kitchen
    • The Cleveland Hogg Burger by Seduction in the Kitchen

    Manly Desserts:

    • Beer Funnel Cake by Killer Bunnies, Inc.
    • Black Forest Cake by Noshing with the Nolands
    • Carob Chip Cookies by Pies and Plots
    • Chunky Monkey Vegan Banana Bread by Ninjabaking.com
    • Fat Man’s Pie by Magnolia Days
    • Pizookies by That Skinny Chick Can Bake
    • Grilled Pound Cake Stacks with Roasted Strawberries by Melanie Makes
    • Strawberry Rhubarb Pie With Mascarpone Cream by La Bella Vita Cucina

    Wine Pairings for Man Food #SundaySupper byENOFYLZ Wine Blog


    Sunday Supper Movement Join the #SundaySupper conversation on twitter on Sunday!
    We tweet throughout the day and share recipes from all over the world. Our weekly chat starts at 7:00 pm ET. Follow the #SundaySupper hashtag and remember to include it in your tweets to join in the chat. Check out our#SundaySupper Pinterest board for more fabulous recipes and food photos.

    Would you like to join the Sunday Supper Movement? It’s easy. You can sign up by clicking here: Sunday Supper Movement.


    Chocolate French Vanilla Coffee Cupcakes

    June 13, 2014

    #shop

    I am a member of the Collective Bias® Social Fabric® Community. This post has been compensated as part of a social shopper amplification for Collective Bias and it's advertiser, Nestle Coffee-mate.


    French-Vanilla-Coffee-Cupcakes


    The 4th of July is coming up soon once again. With all the cookouts and fireworks it's easy to forget the true meaning of the holiday, celebrating our country's independence. That independence wouldn't be possible without our military, who sacrifice every day to protect our freedom. Both my mother and biological father, my step-father, a few of my friends, and many people I have known throughout the years have served in the military. Even my husband works at an Army Depot as a civilian, and is involved with protecting the military’s Internet security. All of them were lucky to avoid being injured, except one, my friend Dave. Today I am saluting his memory in just a small way with these cupcakes, made with Nestle Coffee-mate French Vanilla Creamer.

    I met Dave Morgan in second grade, and instantly developed my first crush. He was cute, and nice, while most of the other boys were still icky. I know we rode the bus together, I know he was nice to me, and that he was also friends with my friend to this day, Michelle. That is all I remember from back then, but I never forgot him. I transferred to a different school after third grade, and didn't see him again for 25 years. We lived in the same city all that time, but it wasn't until one night hanging out at a local bar with my fiancee ( now husband), that I got to talking to this guy and we realized who the other was. We never became close friends , but I would see him at least once or twice a week after that until he went away to Kuwait. He served as a military police officer there, until November 19, 2009, when he suffered traumatic brain injuries after being involved in a collision with an SUV. His partner was killed instantly, but Dave continued to live with the injuries until last summer, when he died of complications from those injuries. I will never forget his viewing, the little boy I had loved was gone at 38 years old, disfigured, unable to care for himself in his final years. I know that this post and these cupcakes can't bring him back, but this is the best way I felt I could honor him, and all of our military heroes.


    Coffee-mate has partnered with Operation Homefront, #CMSalutingHeroes in honor of our military heroes, contributing funds that help to provide a wide range of services to military family. This season they have decorated their French Vanilla and Hazelnut creamers in red, white, and blue, with patriotic stars and stripes. These creamers are only available at Walmart through Independence Day.


    Walmart-Coffee-Mate -Aisle


    I can't be with Dave to enjoy this dessert, he will never know that I still thought about him all those years later, but this is my coffee moment to share with him. Thank you to #CollectiveBias for allowing me to share this story with you.
    I used boxed cake mix in this recipe, because I felt a “coffee moment” should be relaxed and simple. I replaced most of the water with French Vanilla Coffee-mate, and mixed it with instant coffee for just a hint of French vanilla coffee flavor. Baked them as instructed on the box, and set them on a rack to cool.


    Un-iced-French-Vanilla-Cupcakes


    Once they were cooled I began decorating them with red, white, and blue icing


    Iced-French-Vanilla-Cupcakes


    and then topped each one with a decorative flag toothpick.


    Decorated-French-Vanilla-Cupcakes


    Simple, and easy. I hope you get to enjoy these cupcakes this Independence Day with someone you love, and remember to keep the true meaning of the holiday in your hearts.

    Print Recipe
    No ratings yet

    Chocolate French Vanilla Coffee Cupcakes

    Prep Time15 minutes mins
    Cook Time28 minutes mins
    Total Time43 minutes mins
    Course: Dessert
    Servings: 24
    Calories: 128kcal
    Author: Bernadette

    Ingredients

    • 1 box butter chocolate cake mix
    • ¾ cup Coffee-mate liquid French Vanilla Creamer
    • ½ cup water
    • 1 tablespoon instant coffee
    • ⅓ cup butter ,softened ( 6 tablespoons)
    • 3 eggs

    Instructions

    • Prepare cake mix as directed on the box, replacing ¾ cup of the water with the creamer, poured into a measuring cup. Stir in the instant coffee, and mix until well combined. Continue to follow box directions, baking until a toothpick inserted into the middle of a cupcake comes out clean. Cool on wire racks, then decorate as desired with red, white, and blue icing, along with decorative toothpicks.

    Nutrition

    Calories: 128kcal | Carbohydrates: 13g | Protein: 1g | Fat: 8g | Saturated Fat: 2g | Cholesterol: 27mg | Sodium: 179mg | Potassium: 74mg | Sugar: 9g | Vitamin A: 110IU | Calcium: 31mg | Iron: 0.9mg


    Slow Cooker Sticky Chicken -Guest Post from It's a Keeper

    June 10, 2014

    Slow Cooker Sticky Chicken

    Today I'm more grateful than every for my summer guest posters! My friend Christina is here today with a great recipe for Sticky Chicken made in the slow cooker, but before I hand you off to her do you want a quick run-down of this past week? I'll make it short, I promise!

    On Friday night my daughter graduated pre-school. It was at 6 PM so I just made grilled cheese for dinner. Here she is at graduation with my sister.

    Preschool-Graduation


    On Saturday we had a cookout for her and my best friend's daughter, who also graduated pre-school on Friday. It was just hamburgers and hotdogs, along with my Mozzarella Tomato and Artichoke Salad. Then, that night, my daughter got sick with a fever, headache, and belly ache. She has been sick since, and is just starting to feel better tonight. So, basically I haven't been cooking and wouldn't have had anything new to share. Luckily for us all, Christina is here to save the day!

    Hi there! I’m Christina from It’s a Keeper, a food and cooking blog where I test recipes to see if they’re (you guessed it…) keepers! Bernadette has graciously let me take over her blog today and share one of my favorite summer recipes with you.

    Some of the most popular recipes on my blog, It’s a Keeper, are slow cooker recipe. It’s no wonder. They are easy to make and you don’t have to spend time fussing over them.

    I love using my slow cooker – especially during the summer months. Who wants to be inside cooking when it’s so nice outside?! Not me!

    This recipe for Slow Cooker Sticky Chicken is one of my family’s favorites. I love it because it uses fresh ginger and I L-O-V-E fresh ginger! It really adds a great flavor to recipes. If you’ve never used it, you should give it a try.

    Don’t be scared by this gnarly root-looking. Just use a vegetable peeler (or even the back of a spoon) to peel away the outer layer and you’ll find a bright, fresh and super fragrant flesh.

    You can mince it very finely with a knife or use a rasp to finely grate it. I prefer to grate it. If you’re still not convinced to try fresh ginger (or you don’t have any on hand), you can use ground ginger — about a teaspoon should do ya.

    Now, back to the chicken…you may be tempted to skip the broiling part of the recipe, but DON’T!  This final step is what makes the recipe.

    If you love slow cooker recipes, you have to check out my new Slow Cookin’ Summer series. Each week there will be one or two new slow cooker recipes posted to give you inspiration and help build your collection of easy crock pot recipes.  There’s everything from healthy easy dinner recipes to quick easy dessert recipes to crock pot breakfast recipes.  You can get them all here, all summer long!

    So what are you waiting for? You know you want to make these short ribs! Here’s the recipe:


    Print Recipe
    No ratings yet

    Slow Cooker Sticky Chicken -Guest Post from It's a Keeper

    Delicious Sticky Chicken cooked in the slow cooker and finished under the broiler for a delicious, crispy finish.
    Prep Time5 minutes mins
    Cook Time4 hours hrs 5 minutes mins
    Total Time4 hours hrs 10 minutes mins
    Course: Entree
    Servings: 4
    Calories: 918kcal
    Author: Christina from It's a Keeper

    Ingredients

    • ¾ cup brown sugar
    • ¼ cup soy sauce
    • 2 tablespoons of minced ginger
    • 4 cloves of garlic minced
    • ½ teaspoon of cayenne pepper
    • 3 lbs chicken (breast, thighs, legs, etc.)
    • ¼ cup water
    • ¼ cup tomato paste

    Instructions

    • Combine ¼ cup sugar,  2 tablespoon soy sauce , ginger, garlic, and cayenne pepper. Add chicken and toss to coat.
    • Place in a slow cooker and cook on low for about 4 hours or until done.
    • When done place chicken in a broiler proof dish.  Combine remaining ½ cup sugar, water, and tomato paste, and remaining soy sauce. Brush on chicken and cook under the broiler for about 5 minutes or until chicken is slightly crisp.  Keep a close watch on the chicken under the broiler.

    Notes

    Recipe courtesy of Christina at It's A Keeper

    Nutrition

    Calories: 918kcal | Carbohydrates: 46g | Protein: 65g | Fat: 51g | Saturated Fat: 14g | Cholesterol: 255mg | Sodium: 1190mg | Potassium: 921mg | Sugar: 42g | Vitamin A: 830IU | Vitamin C: 10mg | Calcium: 86mg | Iron: 4.2mg


    • « Go to Previous Page
    • Page 1
    • Interim pages omitted …
    • Page 29
    • Page 30
    • Page 31
    • Page 32
    • Page 33
    • Interim pages omitted …
    • Page 44
    • Go to Next Page »

    Secondary Sidebar

    Archives

    Browse by category

    • Appetizers (38)
    • Beef (24)
    • Breads (4)
    • Breakfast/Brunch (29)
    • Broths/Stocks (1)
    • Candy (1)
    • Casseroles (5)
    • Cauliflower (3)
    • Cheese (14)
    • Chicken (49)
    • Chocolate (13)
    • Christmas (14)
    • Cocktails/Beverages (7)
    • Cookies (7)
    • Crock Pot (8)
    • Cupcakes (2)
    • Desserts (41)
    • Dinner (20)
    • Dips (11)
    • Fruit (4)
    • Grilled (7)
    • Ham (6)
    • Healthy Recipes (3)
    • Instant Pot/Pressure Cooker (2)
    • Main Courses/Entrées (79)
    • Meats (8)
    • Pasta (29)
    • Pickles (1)
    • Pizza (8)
    • PKU Friendly (5)
    • Pork (13)
    • Potatoes (11)
    • Salads (14)
    • Sandwiches (4)
    • Sauces (11)
    • Savory Pies (3)
    • Seafood/Shellfish (38)
    • Side Dishes (19)
    • Slow Cooker (12)
    • Smoothies (1)
    • Snacks (1)
    • Soups/Stews (43)
    • Thanksgiving (8)
    • Tomatoes (4)
    • Turkey (11)
    • Vegan (10)
    • Vegetables (21)

    Footer

    ↑ back to top

    • ABOUT
    • RECIPES
    • CONTACT ME/WORK WITH ME!
    • FAQS
    • PRIVACY POLICY

    • Facebook
    • Pinterest
    • Twitter

    Copyright © 2025 Rants From My Crazy Kitchen

    Enter your name and email address to subscribe by email
    Stay up to date on all the latest recipes, reviews, giveaways, and more for free!

    Your privacy is important! Please refer to Rants From My Crazy Kitchen's Privacy Policy for information how we use your information and protect your rights.

    Rate This Recipe

    Your vote:


    A rating is required
    A name is required
    An email is required